
 3 months ago
39
3 months ago
39
PROTECT YOUR DNA WITH QUANTUM TECHNOLOGY
Orgo-Life the new way to the future Advertising by AdpathwayYour lawn can die for many reasons. It may struggle through winter due to frost, snow molds, or moisture imbalances. This isn’t to say that all grasses suffer in winter, only that the cold months are likely when you’ll see damage. Fixing winter damage issues to recover the lawn is easy once you know what to do.
Lawns die back or form bare patches in spring because of the following reasons:
| Condition | Description |
| Crown Hydration | Temperature swings cause thawing and refreezing in the grasses’ crowns. |
| Desiccation | Lack of snow and moisture leads to thirsty, dry plants. |
| Frost and Ice | Thick ice layers prevent grasses from thriving. |
| Low Temperatures | Exposed lawns may die back when temperatures are low. |
| Snow Molds | Fungal growth that appears under snow cover on nitrogen-rich sites. |
Knowing why your grass is dying will help you correct the issues to prevent further damage. If the lawn suffers during winter, fear not! These six steps will guide you through fixing, repairing, and maintaining your winter-damaged lawn.
Soil Testing
Kit

Organic Plant Food

Espoma Bio-tone Starter Plus Organic Plant Food (4 lbs.)
Phosphorous Boost

Phosphorous Boost: Seabird Guano
Step 1: Wait for Spring
 Wait for spring warmth before checking if grass is dormant or dead by observing new growth.
It’s difficult to tell whether a lawn is dormant or dead during the cold months. Many species lie dormant starting in the fall. They pull resources from the leaf blades into their crowns and roots, storing energy and nutrients underground. This helps them survive low temperatures and little light.
It’s best to wait until spring’s warmth arrives before determining whether grass is dead or dormant. As new growth emerges from the crowns you’ll quickly see which parts of the yard are green and which stay bare.
Bare patches with brown, black, or yellow blades are telltale signs of dieback. If no new growth emerges while the rest of the area thrives, you can safely assume the patch is dead.
Step 2: Clear Weeds and Debris
 Use a dethatcher or fine-toothed rake to remove debris, then compost or bury the waste.
Dead spots should easily come up! No living roots hold the plants down; they’ll come right off the ground with little effort. Aside from dead grass, you’ll also want to remove twigs, stones, and weeds. Weeds are particularly troublesome, as they use bare soil to propagate themselves. Remove them to give new grasses a chance.
You may use a dethatcher to remove dead plants, though a fine-toothed rake works well on small and medium sites. Simply rake over the debris and put it in your compost pile. If you don’t have compost, you can bury the scraps a foot deep underground or dispose of them in your green waste bin.
Some weeds may not come up after dethatching. Removing dandelions, cat’s ears, and clovers require weeding tools or tough hands. Focus on weeding species that rapidly spread through runners, like bindweed, spurge, and crabgrass.
Or, you can opt for an alternative lawn and keep the clovers! Rather than removing all the weeds, you can let low-growing species intermingle among the grasses. This creates a tough, resilient lawn that is drought and frost-resistant.
Step 3: Add Fertilizer or Amendments
 Spread fertilizer or compost evenly, using hand or broadcast spreaders to match new grass height consistently.
After removing dead debris, the site should have fresh dirt ready for planting. Rake the soil so it’s even and clump-free. Both seeds and grass sod benefit from flat, rich soil at planting.
Some yards may have all the nutrients necessary for healthy plant growth, though others may lack them. Use a soil testing kit to determine whether or not you need to amend the soil. If the test shows low nitrogen, phosphorus, and potassium, it’s a good idea to amend or fertilize the soil.
Compost is an easy way to amend and fertilize the site. It’s made of decomposed organic material; it adds structure, absorbency, and nutrients to existing soils. If you don’t have compost, consider adding an organic fertilizer high in phosphorus. A starter fertilizer with a 10-20-10 or similar rating works well for reestablishing grasses.
Spread fertilizer or compost at an even rate. You want the new grass to sprout at the same height as the rest of your lawn. Hand and broadcast spreaders are excellent tools for spreading amendments at even rates. Follow the fertilizer’s instructions for proper application rates.
Step 4: Choose Seeds or Sod
 Reestablish grass with seeds or sod; seeds are cheaper, but sod establishes quicker and fills gaps faster.
You have two options for fixing your winter-damaged lawn: seeds or sod. Seeds are cheap, though they take longer than sod to establish themselves. Sod is the rolled-up grass spirals you’re used to seeing on new landscapes. Landscapers unroll them and cut out pieces that fit the bare patches of your yard.
Though sod establishes quickly, it’s more expensive than purchasing seeds and it offers fewer varieties. You can find hundreds of varieties of seed, but only a few are available as sod.
There’s no right or wrong choice—simply select whichever option works best for you and your yard. I recommend seeds for most patches, especially ones smaller than a few square feet. A mix of both seeds and sod also works well if you have many bare spots with irregular shapes.
Step 5: Plant New Grass
 Spread seeds evenly by hand or spreader, then lightly rake to press seeds into the soil.
Once you decide on seeds or sod, you’re ready to plant! A proper spring planting sets the yard up for success during the growing season. When planting grass seeds, read the label on the package to find application rates. It’s best to follow the instructions, though you can always overseed to promote dense, thick growth.
Spread seeds with your hand, letting them fall through your fingers at an even rate. Drop and hand spreaders work well for medium and large sites. After spreading, lightly rake the areas to ensure the seeds come in contact with the dirt.
For sod applications, unroll the spirals and place them down on the yard like bricks. You don’t want to arrange them in lines, since the pattern creates channels where water runs off. Alternate each row so the rectangular patches of sod create a brick-like pattern.
Step 6: Monitor the Site
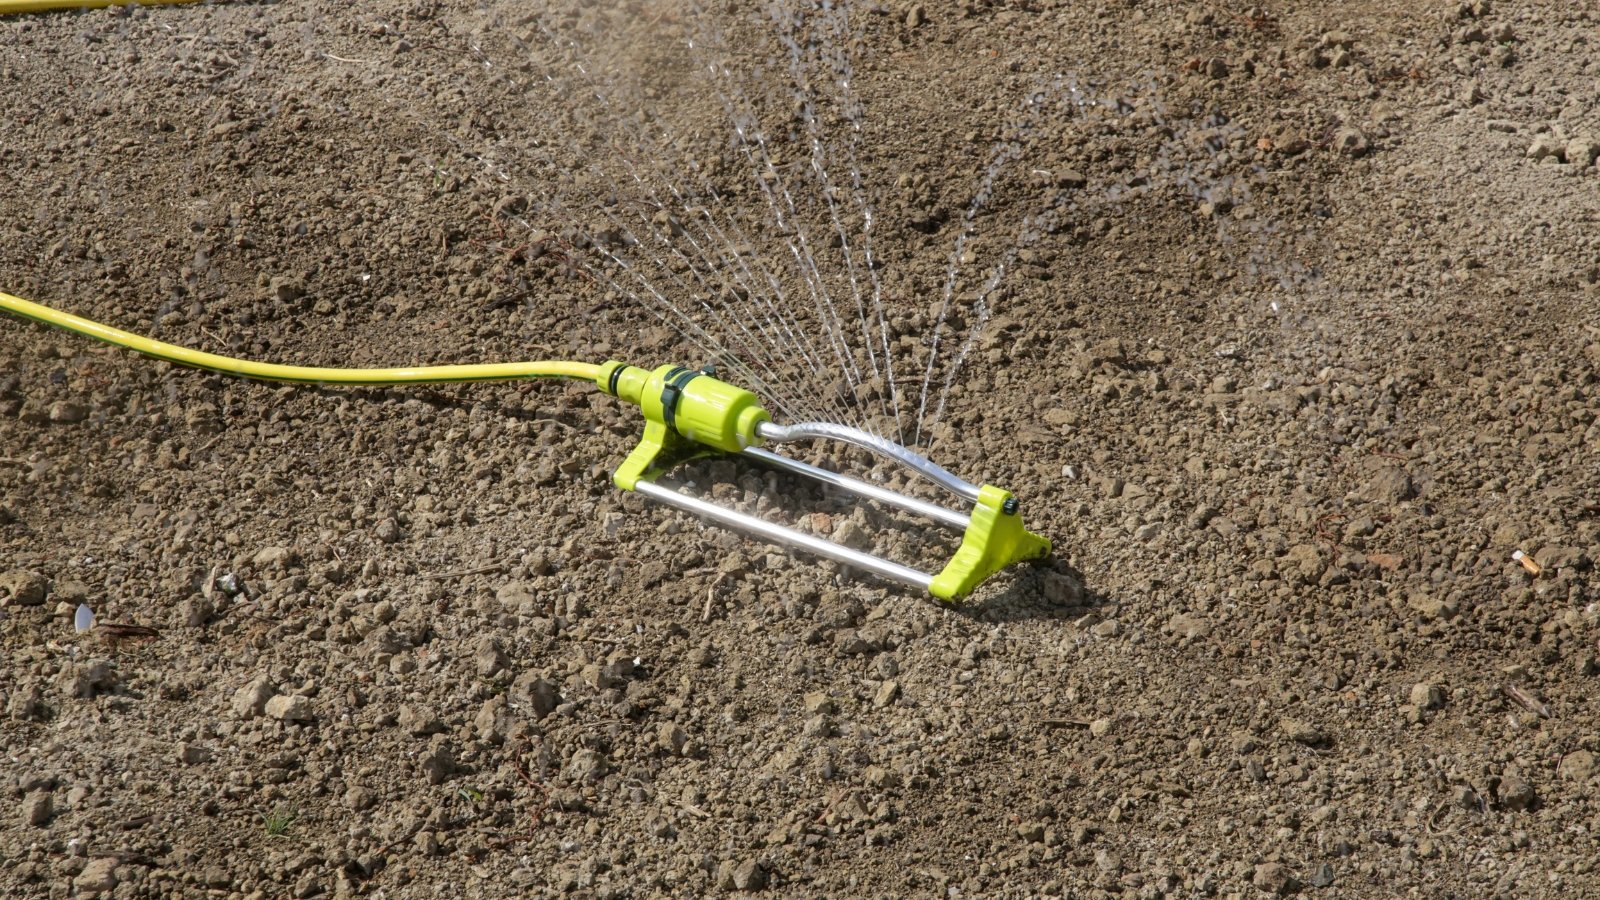 Keep soil consistently moist, not soggy; seedlings need damp soil like a wrung-out sponge to thrive.
Consistent moisture is key to growing healthy grasses and fixing winter-damage on your lawn! Seedlings are at risk of drying out or suffering from sogginess and rot. Their small, weak root systems need perfect amounts of moisture to thrive. You want to apply water so the dirt is moist but not soggy. It should feel like a wrung-out sponge when you grasp a clump.
As the seedlings mature, cut back on watering to promote deep roots in the lawn. There’s no proper guideline on how frequent this is—use your observing skills to determine how wet or dry the soil is. How often to irrigate depends on your climate, light levels in your garden, and your yard’s soil type.
If the new patches die during spring or summer, wait until fall arrives and try replanting the lawn again. Spring and fall are ideal for reestablishment because of the ample moisture and cool temperatures common in those seasons.


 English (US) ·
  French (CA) ·