
 9 months ago
159
9 months ago
159
PROTECT YOUR DNA WITH QUANTUM TECHNOLOGY
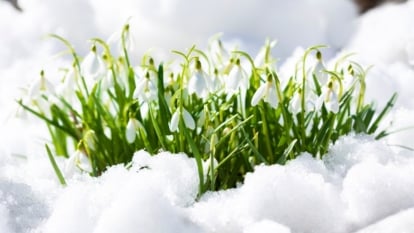
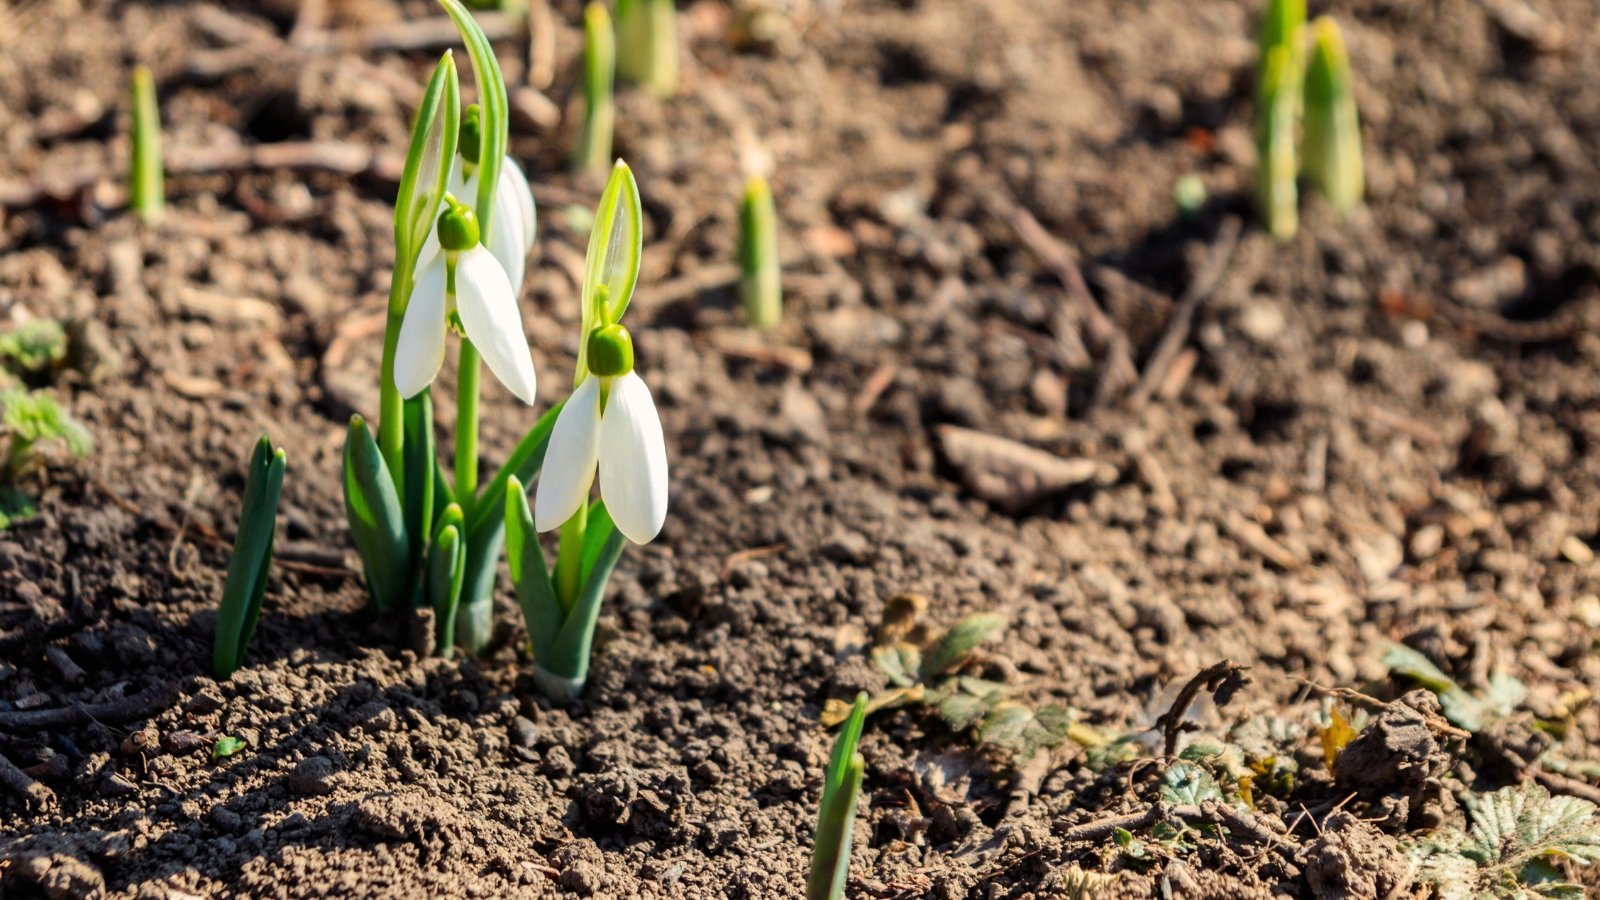
Orgo-Life the new way to the future Advertising by AdpathwaySnowdrop flowers grow whether you cultivate them or not! They tend to naturalize in gardens, forming many clumps that appear in late winter and disappear at the end of spring. Plant them once and you’ll have snowdrops for decades to come.
Because of their easy-growing habits, it’s simple to divide and propagate existing clumps. Nurture your snowdrop flowers well and you’ll have plenty to spread throughout your yard, or to give to your friends.
There are many snowdrop varieties and species available. Find a classic type, or look for a new, funky cultivar. New cultivars have unique petal markings, leaf sizes, and flower shapes.
If you want to get the most out of your snowdrop flowers, follow this guide to successfully grow and care for them.
Snowdrop Overview
|
Latin name Galanthus spp. Plant Type Bulbous perennial Family Amaryllidaceae Genus Galanthus |
Native Area Eurasia Exposure Full sun to partial shade Height 4-12” Watering Requirements Low |
Pests & Diseases Little to no pests Maintenance Low Soil Type Well-drained Hardiness Zone 3-9 |
What Is It?
 Eurasian natives now flourish in gardens around the world.
Snowdrops are flowers that grow from bulbs below ground. Their bulbs allow them to stay hardy despite summer droughts and winter freezes. Though they originate from countries in Eurasia, they thrive worldwide in temperate climates.
Native Area
 Woodland favorites also flourish beside cheerful spring companions.
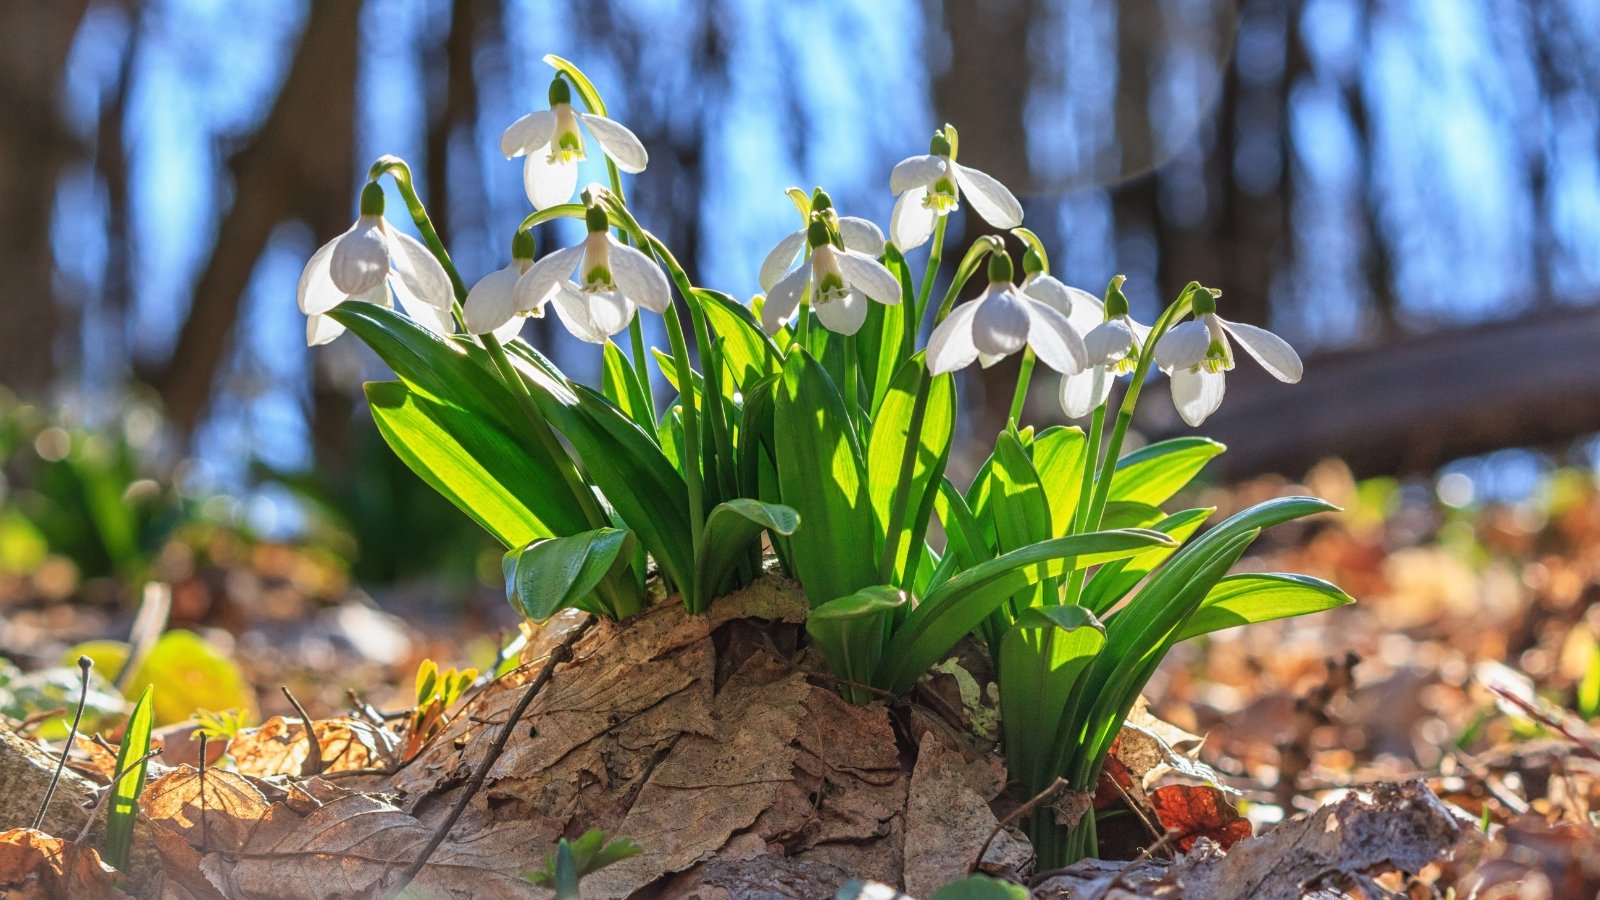
Snowdrops are native to Europe and western Asia. They grow wild in forests with dappled shade, and they also thrive in the moist meadows and grasslands of mountainous areas. Snowdrop flowers prefer cool temperatures, frosty weather, and good-draining soil in their native range.
Outside of their native range, these flowers thrive in similar conditions. They grow well in lawns, under trees, and tucked next to daffodils and tulips in sunny borders. You’ll learn to look for them in late winter, as you wait for their green shoots to poke up out of the soil.
Characteristics
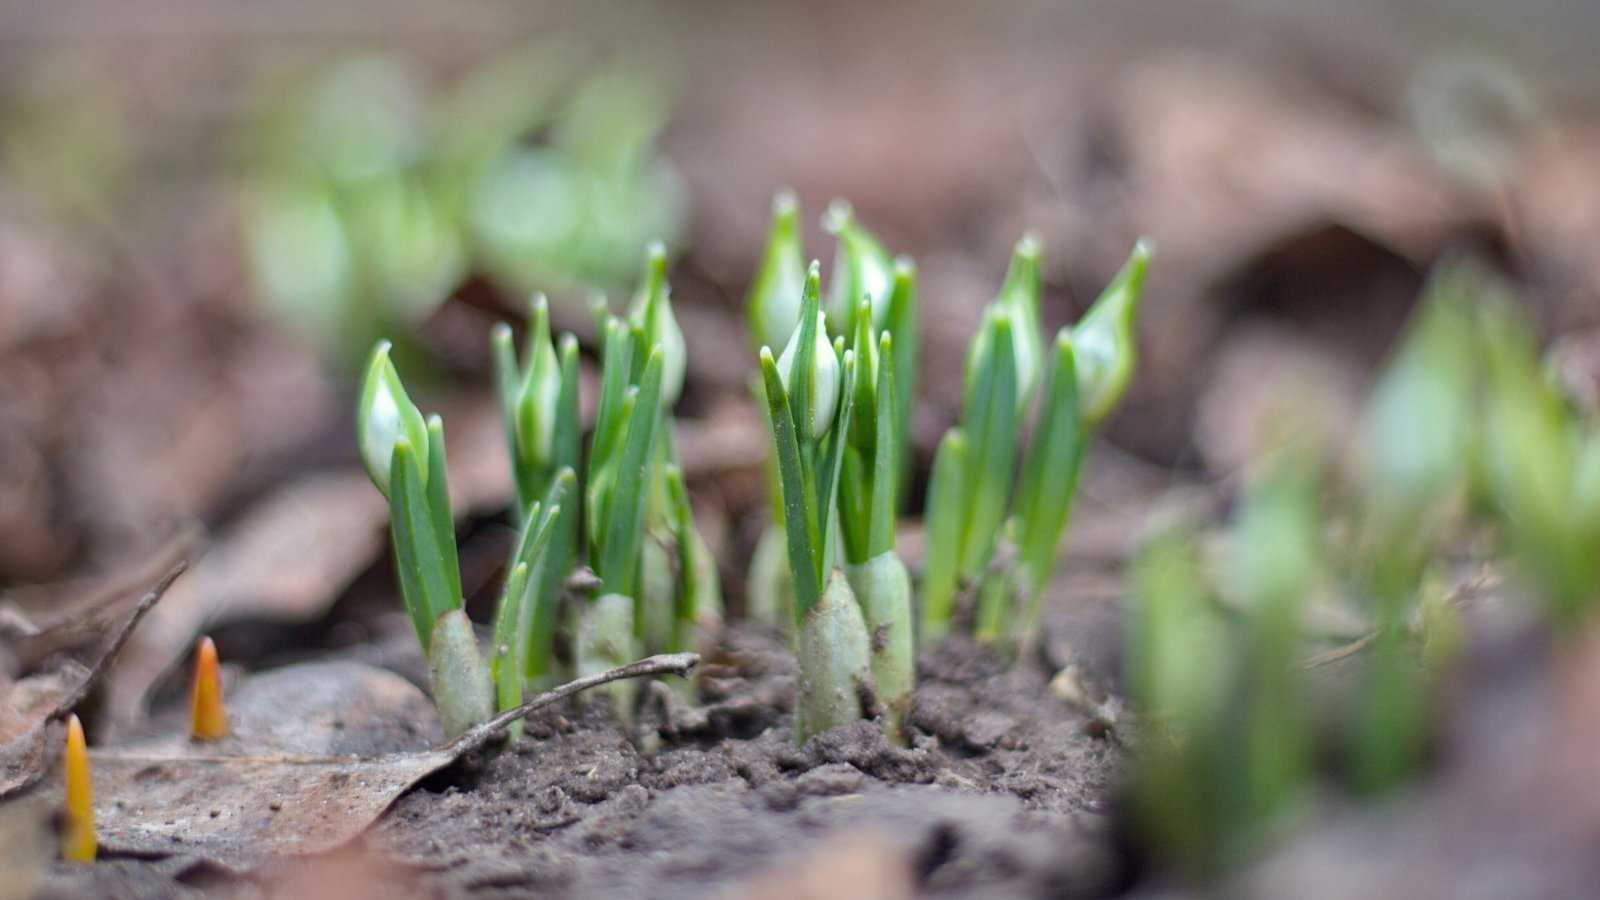
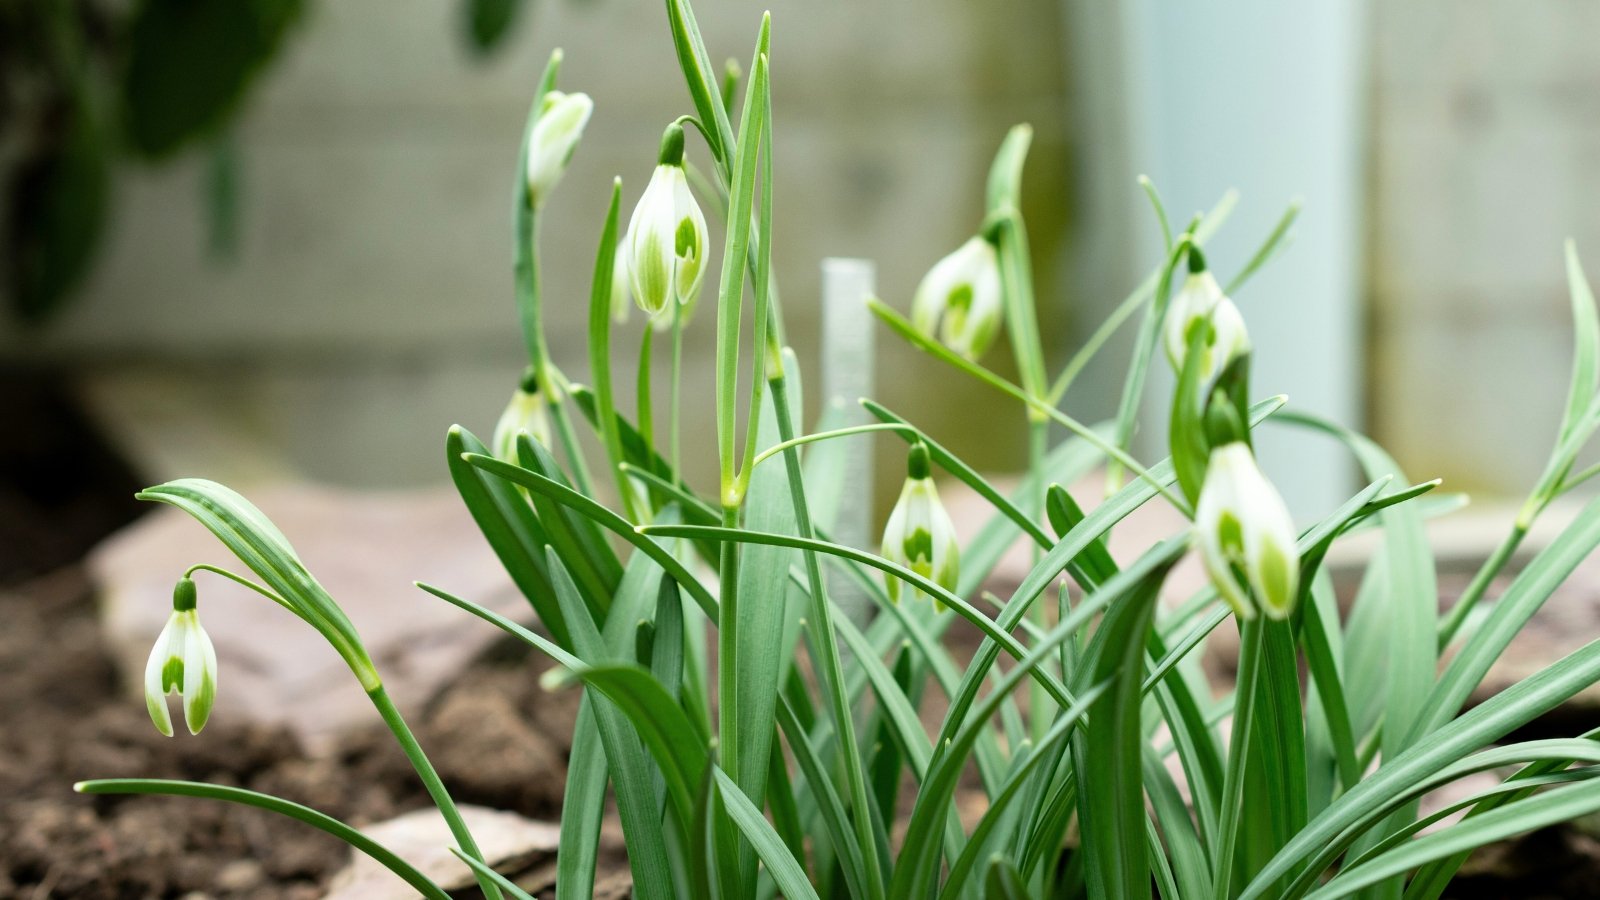
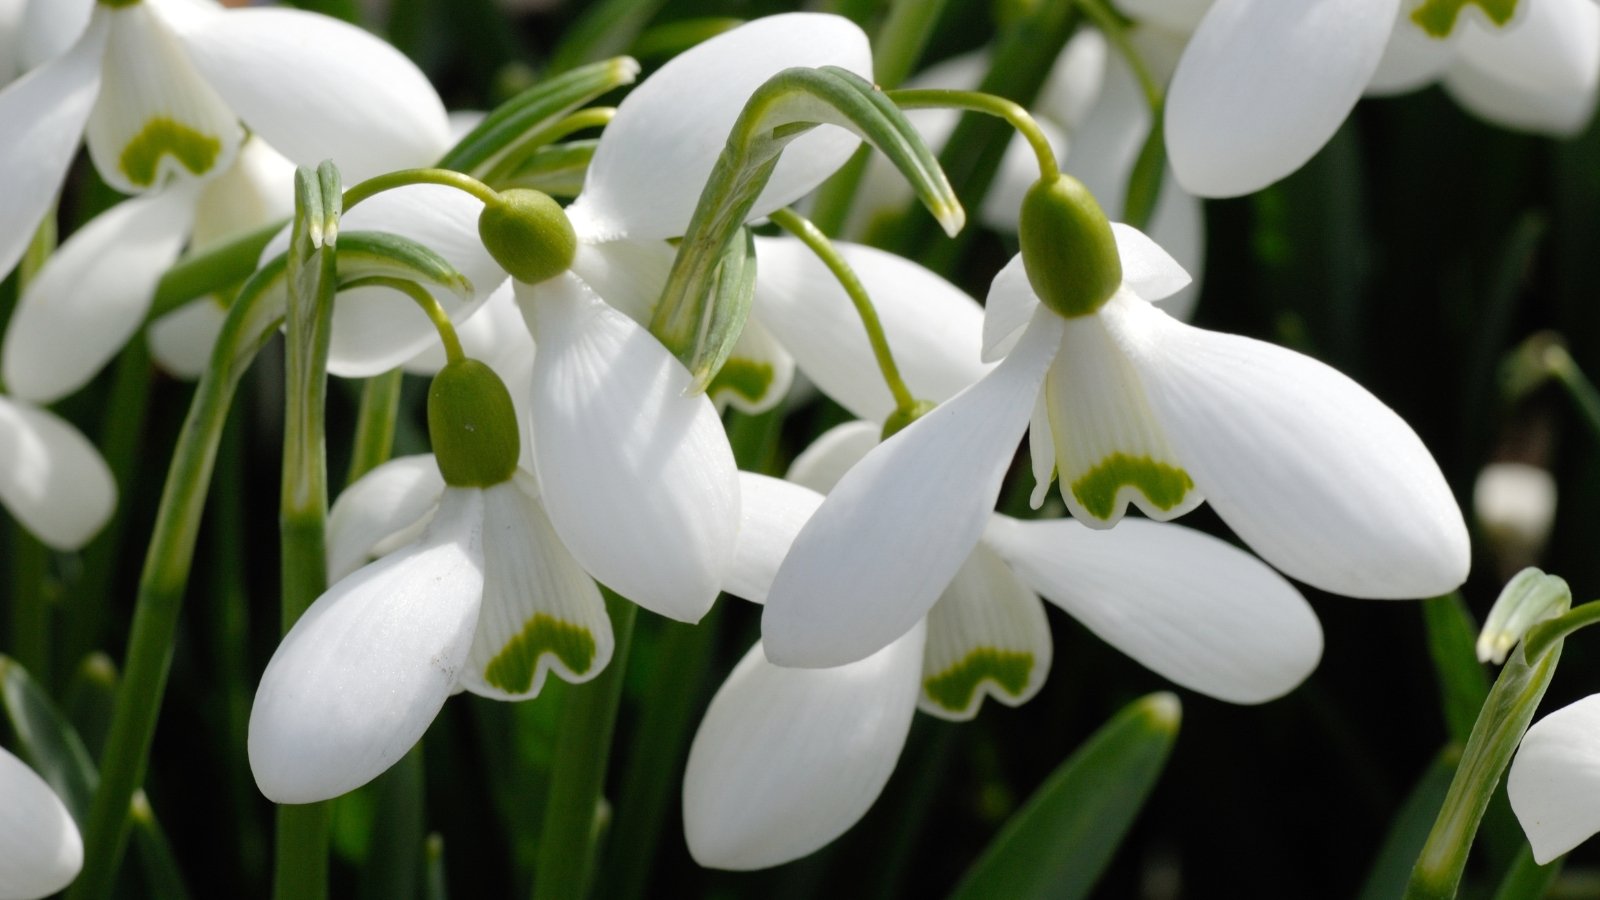
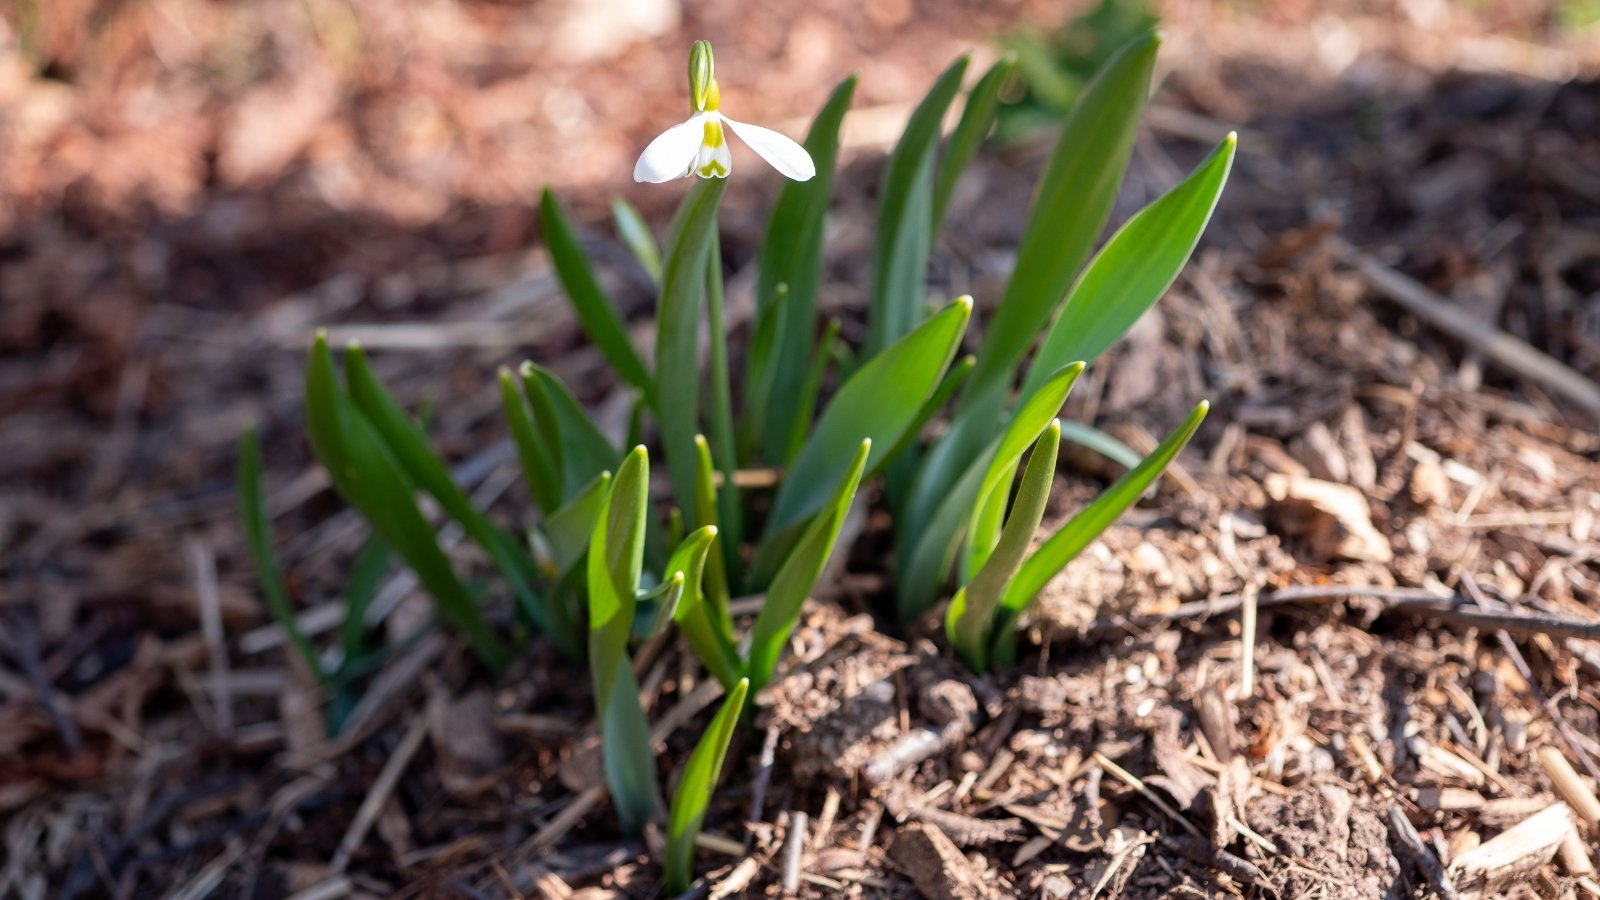
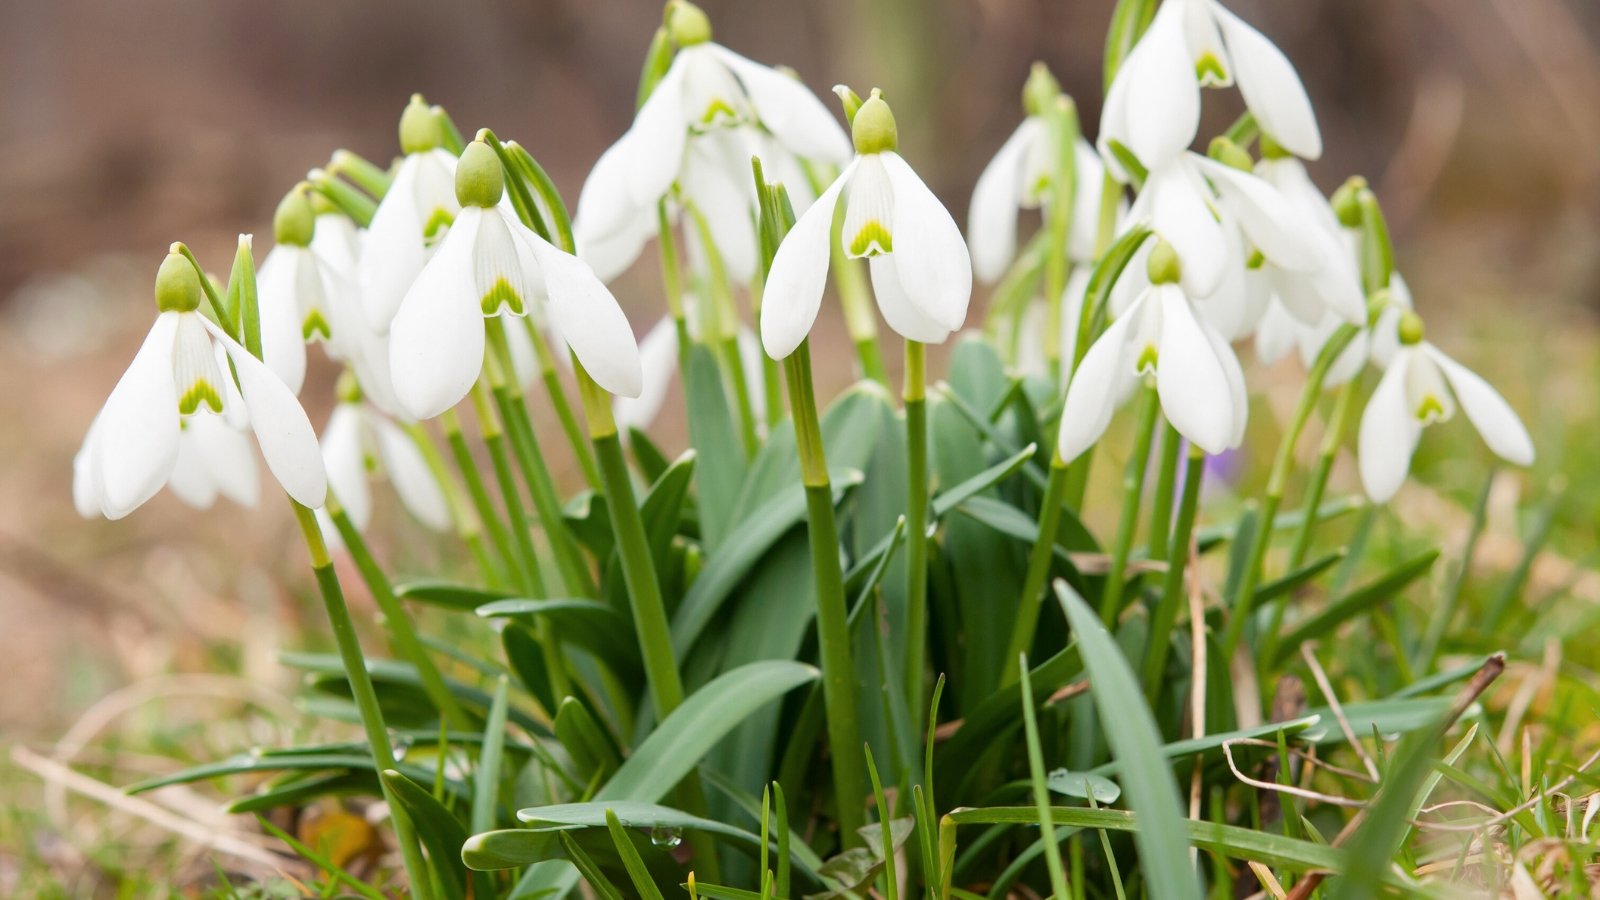 Delicate flowers rise tall from shoots as days lengthen.
Snowdrop flowers sprout from true bulbs, not corms or rhizomes. The bulbs are brown and round, and they sit a few inches under the surface of the soil. Green shoots emerge from the bulbs when the days begin lengthening early in the growing season.
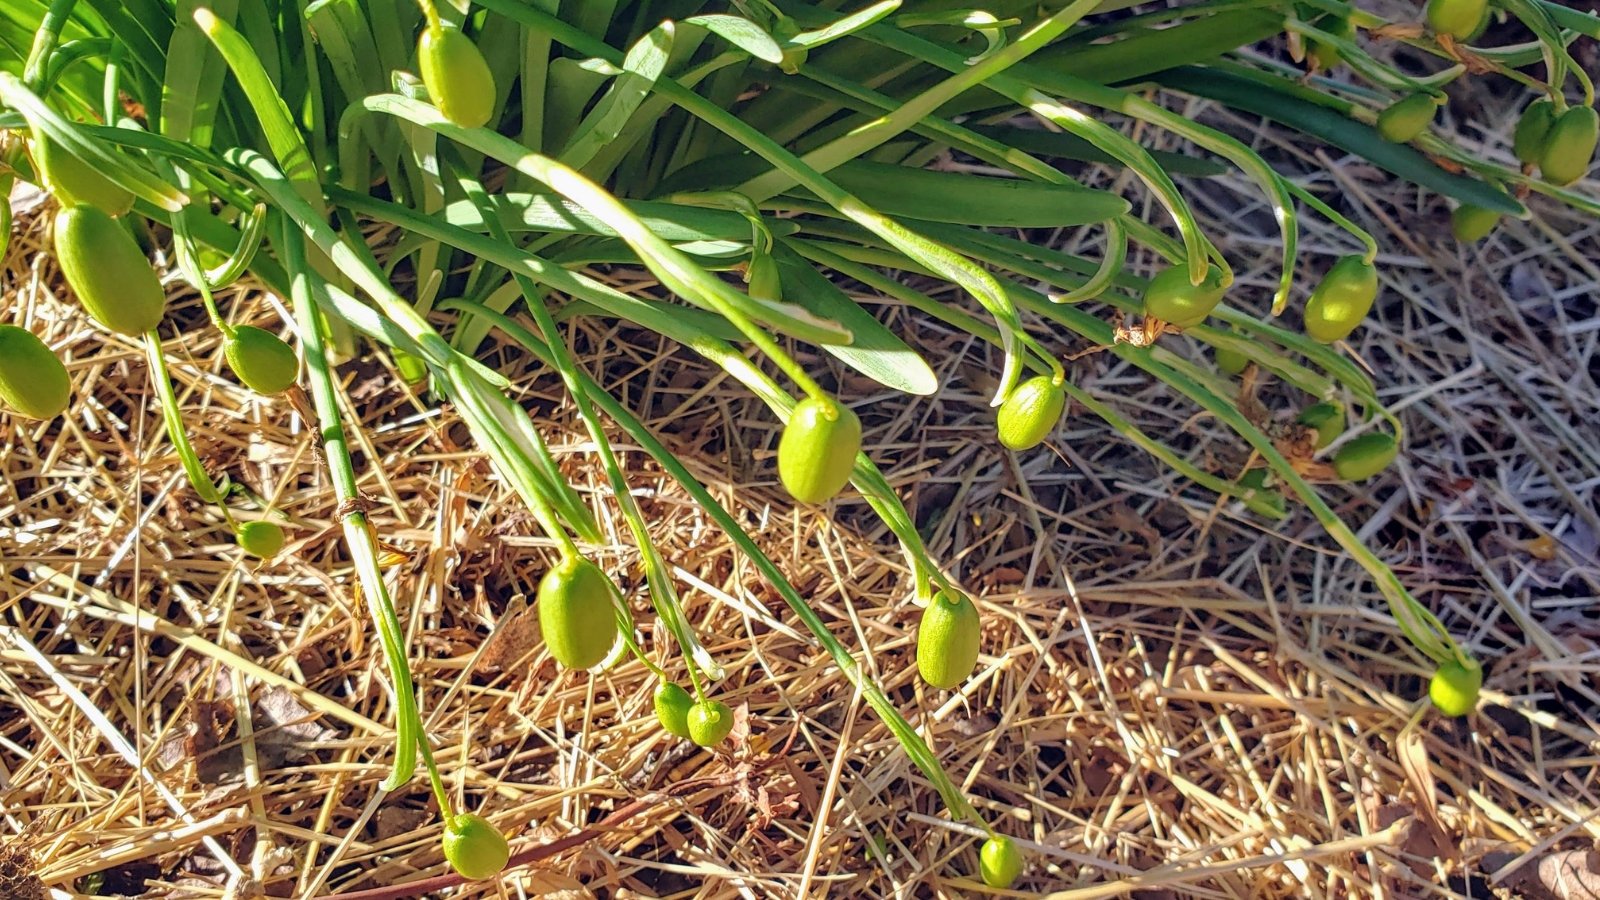
From the shoots grow white, dangling flowers that hang from their stems. They open up over a few days and stand tall amongst the leaves. After the flowers fade, green fruits form with seeds inside.
The seeds have little structures on them with nutrients that attract ants. The ants eat the fatty structures, called elaiosomes, and they disperse the seeds throughout the garden. This is why you may see new snowdrop clumps pop up far from the original planting site.
After blooming, fruiting, and setting seeds, snowdrop flowers enter dormancy for the rest of the growing season. Their leaves turn yellow, and they die back. After the leaves die, you may mow the plants down if they’re growing in the lawn.
Planting
Whether you’re sourcing potted plants from a nursery or starting seeds, the planting process is crucial in setting up snowdrop flowers for success. Choose a good growing site, prepare the area, and get your snowdrops ready for transplanting.
Growing from Seed
 New varieties sometimes emerge from carefully tended seedlings.
Most growers cultivate snowdrop plants from bulbs, as they’re easier to plant and quicker to sprout blooms than seeds. So, why would you grow them from seeds? Seeds offer the chance of finding a new variety. When they sprout, the seedlings may have different characteristics from their parents.
Start by sourcing seeds. Collect them from the fruits, or source them from a reputable seller. Scatter them on trays with a few inches of potting soil, and tamp them down on the surface. Cover them with a thin layer of potting soil, and mist the surface to help the layer settle.
Place the trays outdoors on a porch, in an unheated greenhouse, or in a cold frame. Keep them moist, but not soggy, and wait for sprouts to appear. They’ll shoot up from late winter through spring.
Seed-grown plants may take three to four years before they flower. Cultivate them in pots for the first year, then transplant them into the ground next spring.
Transplanting
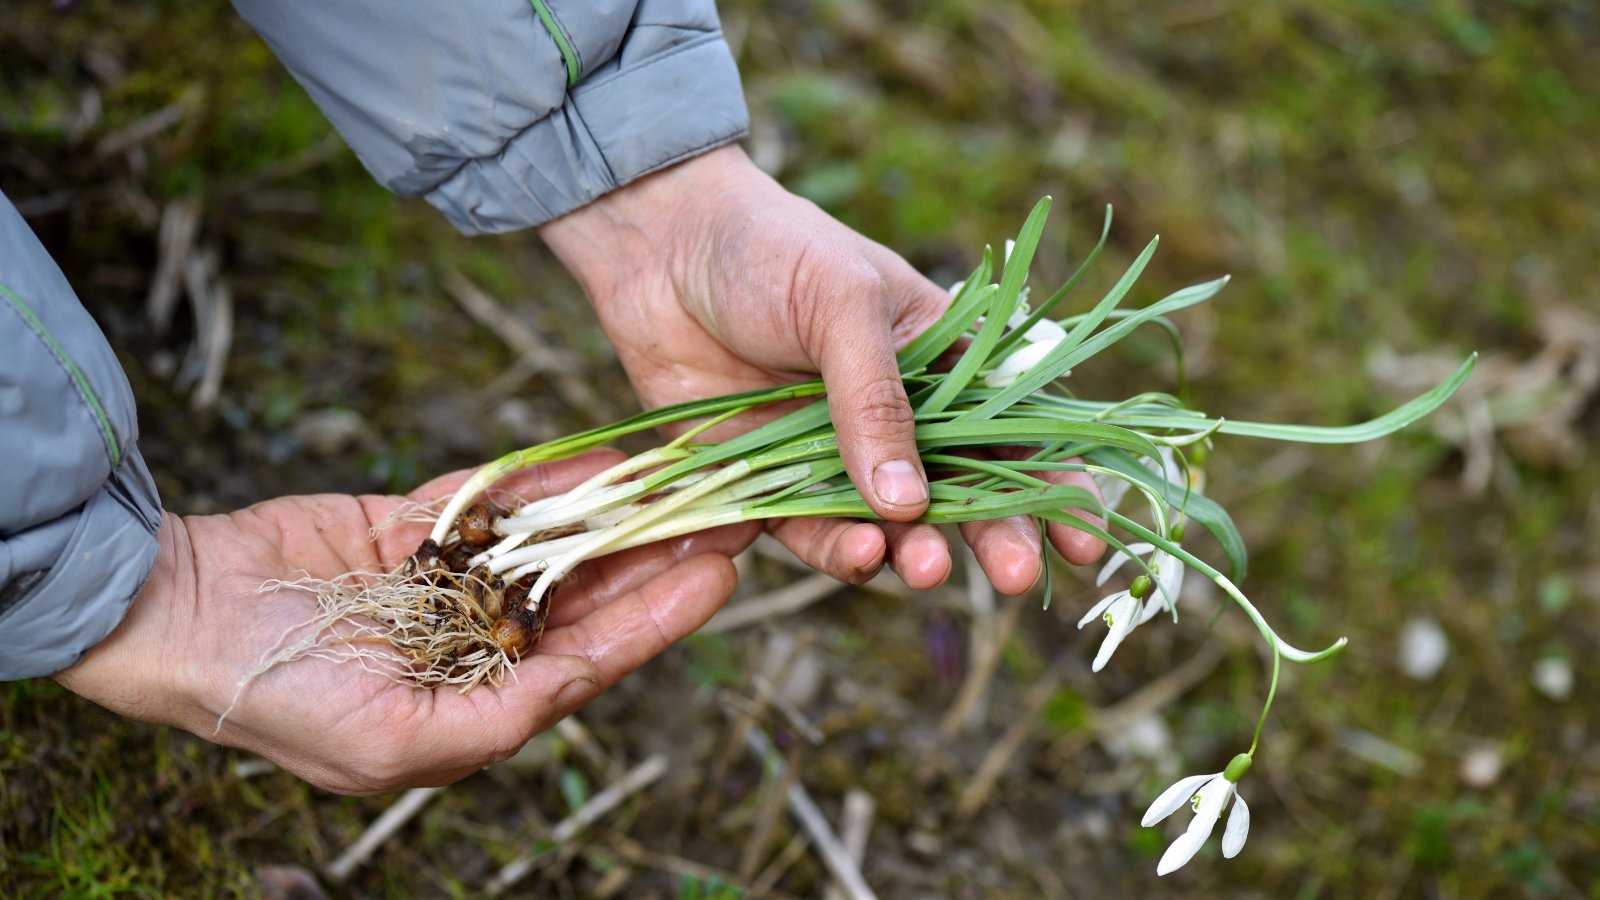
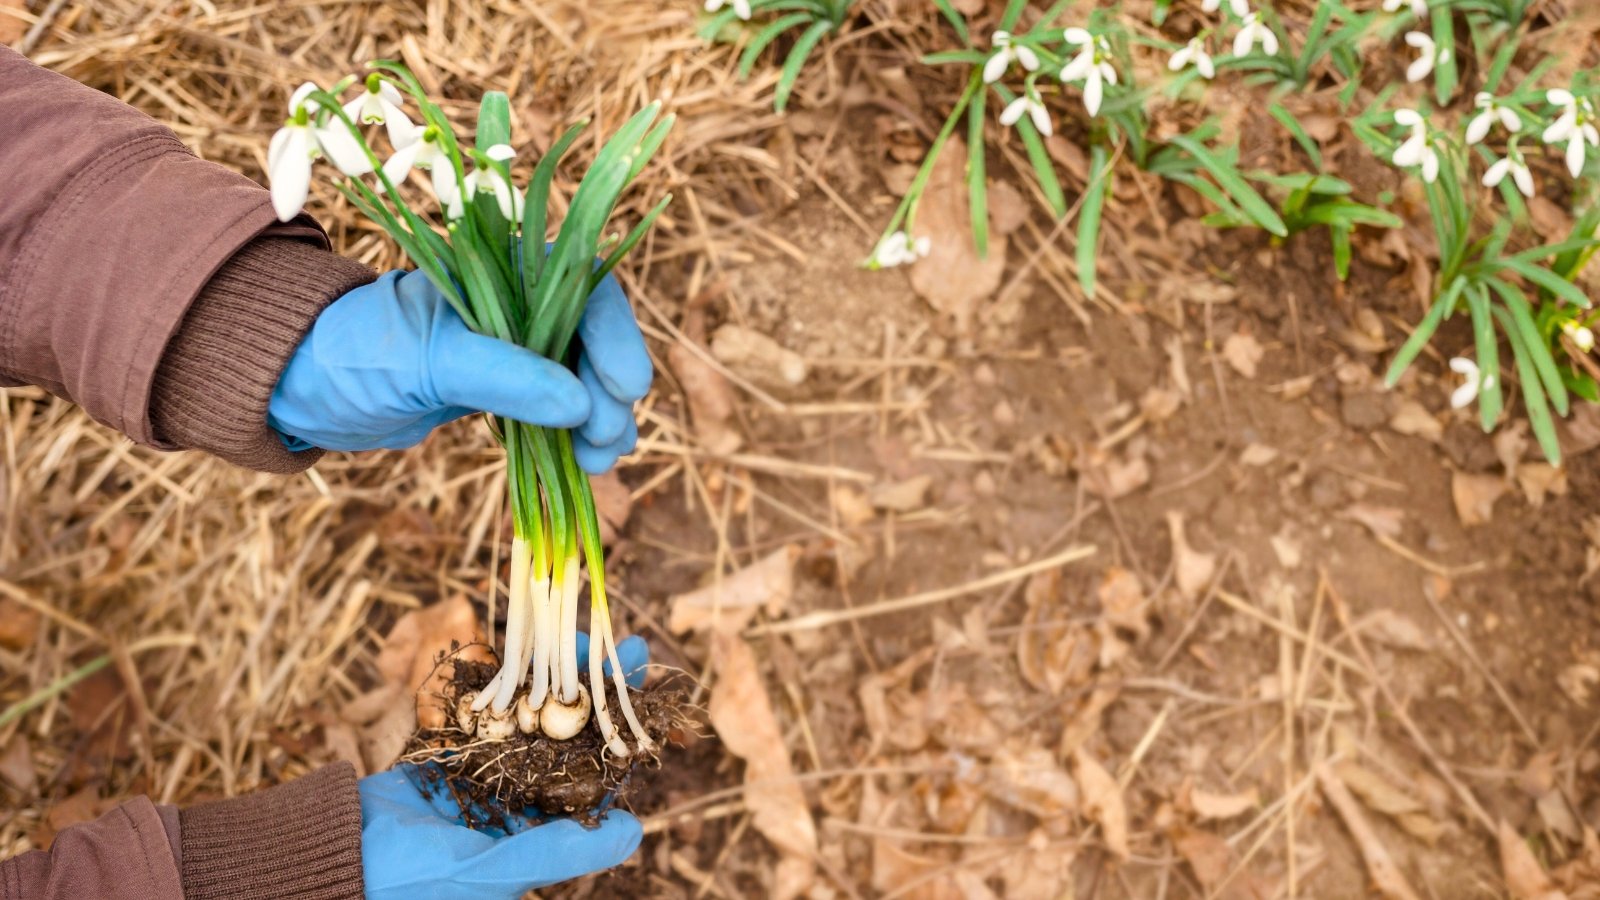 Handle roots with care, as they’re delicate during moving.
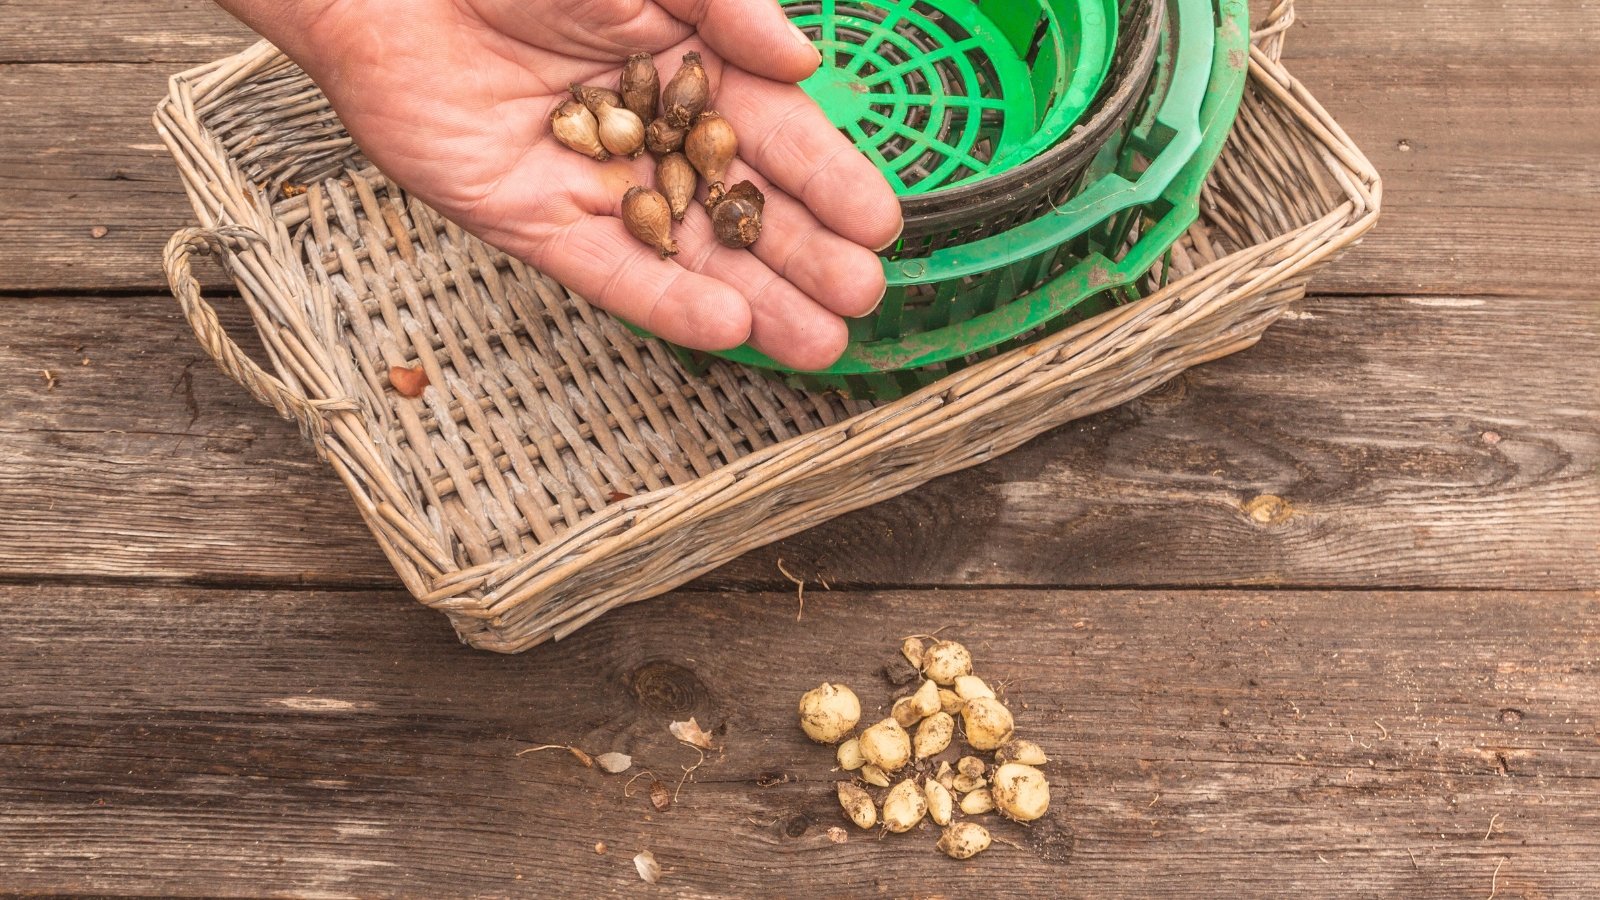
How to transplant a snowdrop depends on its growth state. Transplant dry bulbs in the fall, and plant living plants after their flowers fade in spring. Unlike other bulbous perennials, snowdrop bulbs struggle to establish if you move them when they’re dormant.
Start by digging a hole. Dig three inches deep, and set the snowdrop specimen in the hole so its bulb rests on the bottom. Repeat the action, digging holes three inches apart from each other.
Take care when moving living plants, as their roots are sensitive. Move them gently, then cover up the bulbs and roots with soil. Water the site well, and keep the area moist while the snowdrop flowers establish themselves.
How to Grow
Snowdrop bulbs grow well with little care. Give them the conditions they need to succeed and stand back. Then watch as they flourish in your yard and spread slowly each year. The common snowdrop grows perennially in USDA hardiness zones 3 through 9, and it’ll work well in many states across the U.S.
Light
 Bright leaves shine best with steady hours of sun.
Snowdrop leaves look their best under full sun or partial shade, with at least three hours of daily direct sunlight. They’ll also survive under dappled sunlight, like under a tree or shrub, for example.
Snowdrops are perfect candidates for growing under deciduous trees. They’ll emerge before the trees break bud to take advantage of the extra sunlight. Then, when the trees grow leaves, the snowdrop plants enter dormancy for the summer.
Water
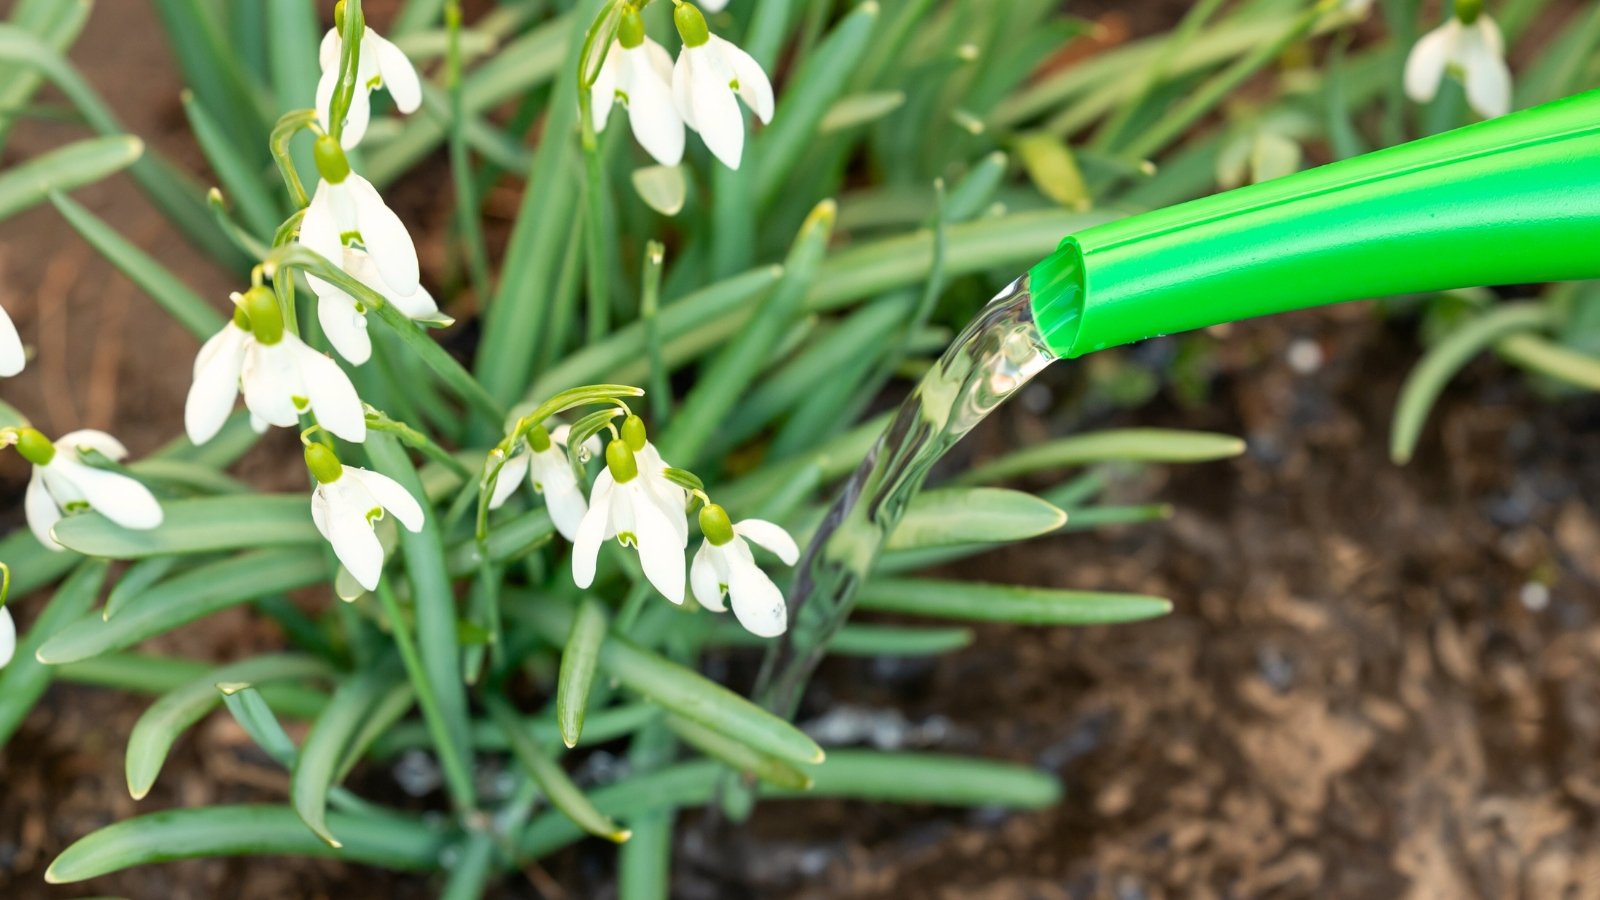 Too much summer water can cause real trouble.
Give your perennials regular water during the growing season. They grow the most flowers when the soil is moist. Then, after they enter dormancy, they’re drought-tolerant for the rest of the year.
Watering too much during the dormant season can spell disaster for your snowdrop flowers. Water plenty when they’re growing, and avoid irrigation altogether when they’re hibernating through the warm months.
Soil
 Good soil care always rewards with lasting beauty.
Proper watering relies on good soil. If it’s too dense or sandy, water will drain slowly or too quickly. It’s best to grow snowdrop flowers in well-drained soil. Avoid sites with heavy clay, and stay away from free-draining sites with lots of sand.
If the soil isn’t great for growing, consider amending it with compost. Compost helps both sandy and clay soil. It amends the site with nutrients, facilitates drainage, and adds organic matter to the ground. It’ll help any soil type become more accommodating for snowdrop bulbs.
Fertilizing
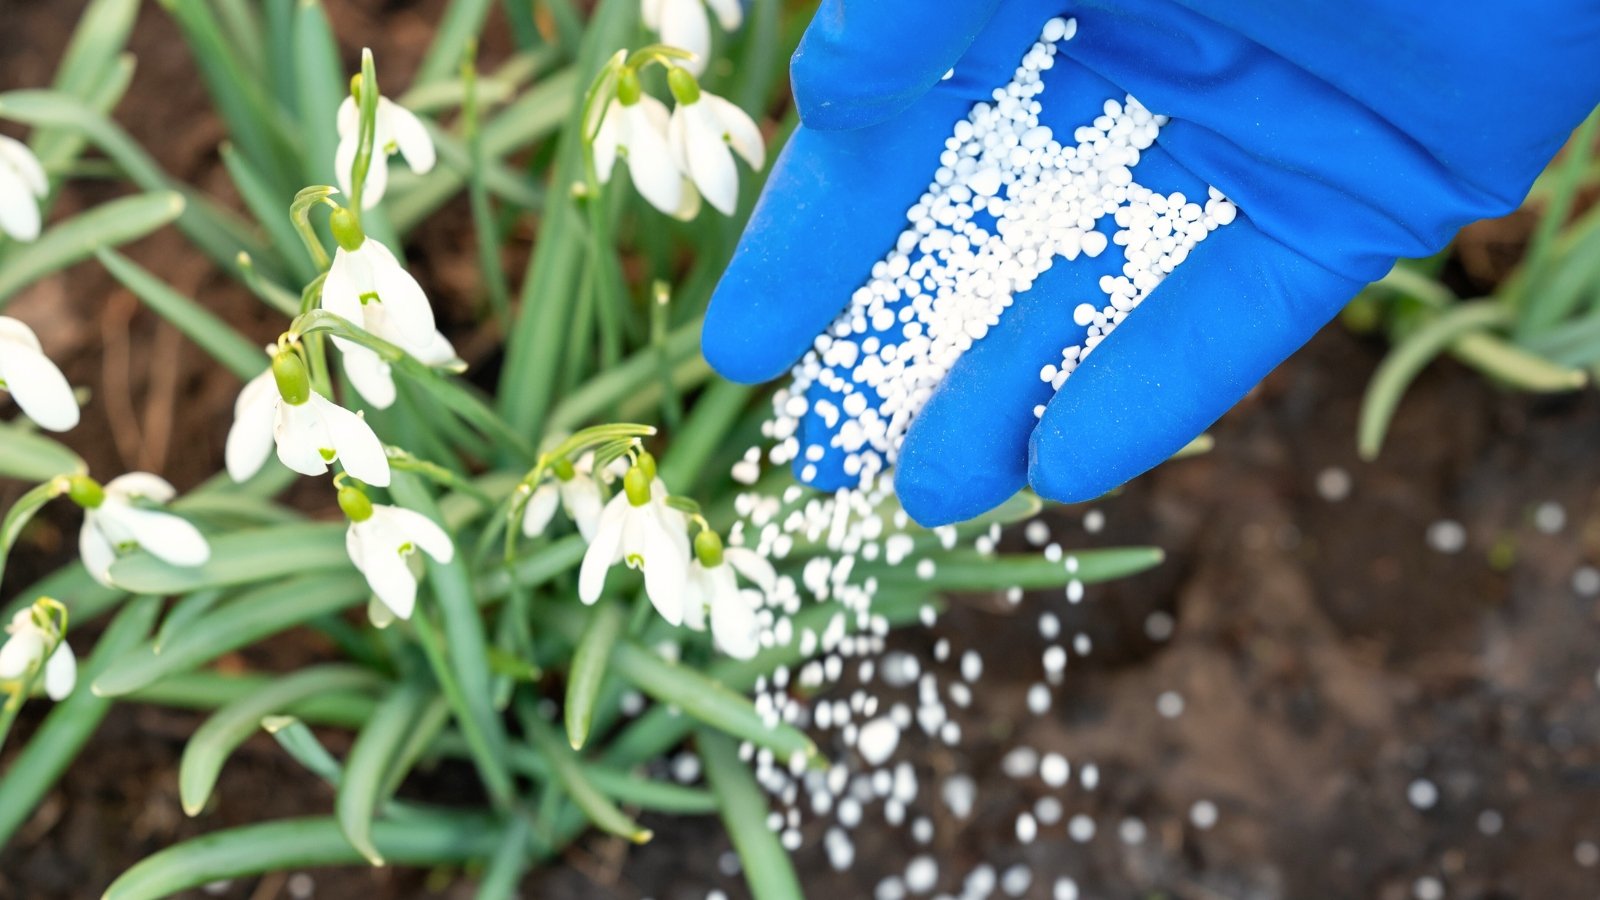 Late-winter feeding supports fresh green shoots with energy.
Snowdrops tend to fare well with little fertilizer, especially if the soil is already rich in nutrients. If you do decide to fertilize, do so during late winter when the plants are growing, or in the fall when they’re producing roots.
Use a well-balanced organic fertilizer, applying it according to the package’s instructions. Water it in well, and splash it off the leaves if any spots got on them.
Instead of fertilizer, you may feed your snowdrop beds with compost. Cover the soil with a layer two to three inches thick in the fall, and reapply it after new shoots appear in late winter and early spring.
Maintenance
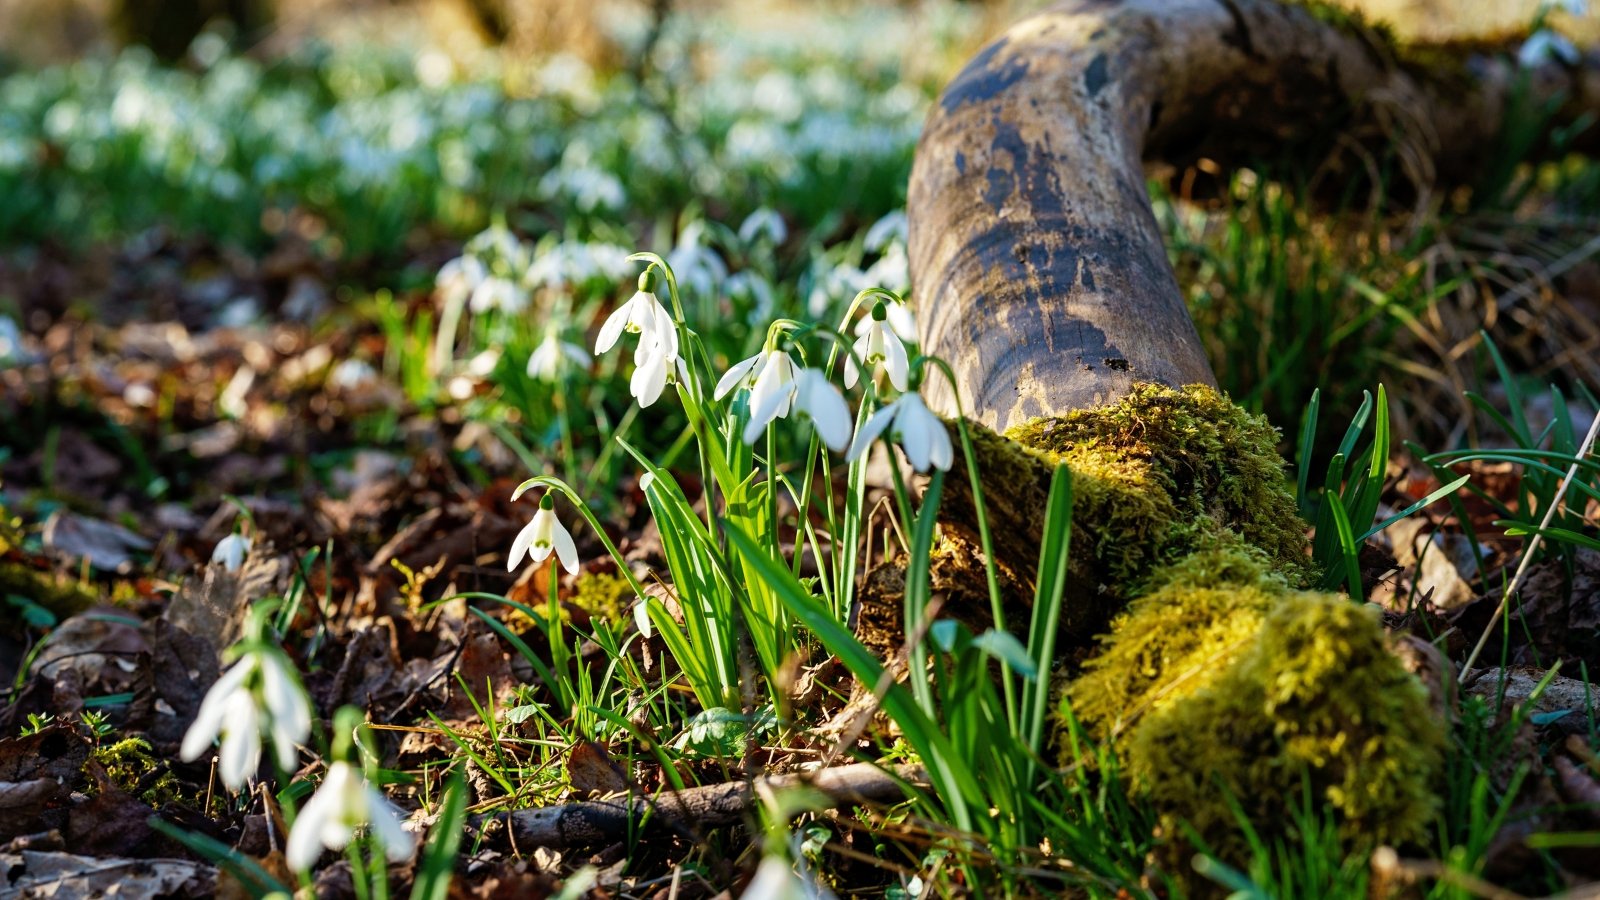
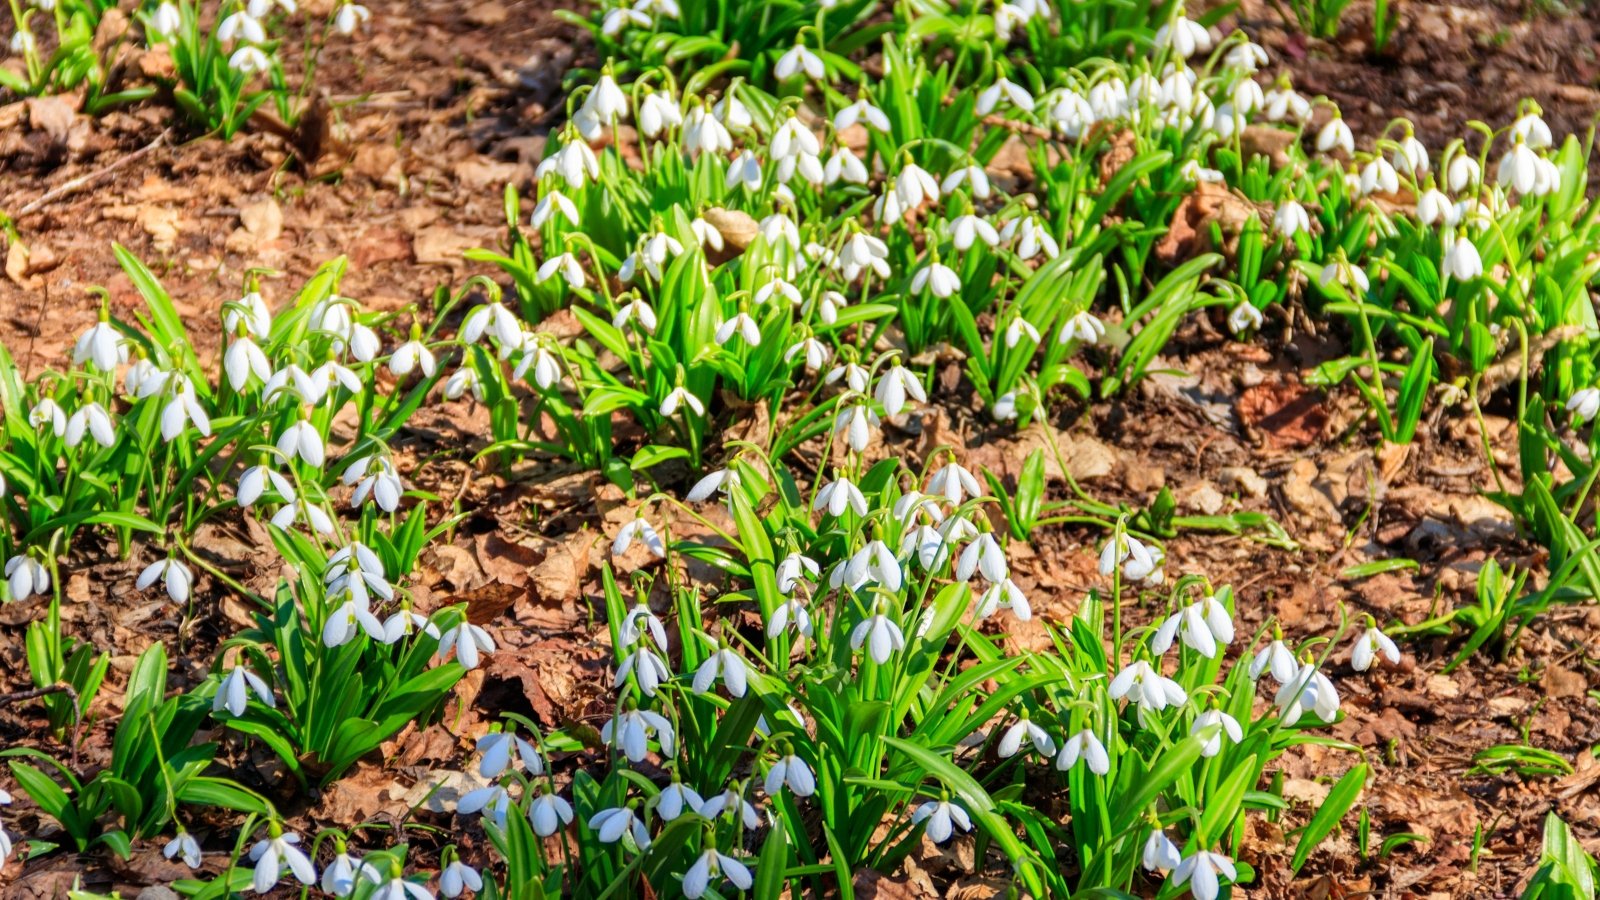
 Dividing clumps every few years encourages fresh growth.
Snowdrop flowers are low-maintenance. There’s not much you’ll have to do to keep them happy and healthy. You may remove the foliage when it dies back in late spring and early summer.
Aside from some light pruning, you’ll also want to divide the plants every three to four years. This gives you new plants to propagate, and it also opens up the existing clumps to thrive with fresh growth.
Propagation
Propagate your snowdrops using division, twin scaling, or seeds. Divisions are the easiest to propagate, and they produce clones of the original plant. Sow seeds if you’d like variable characteristics in the seedlings. Twin scaling is difficult but rewarding in its results.
Division
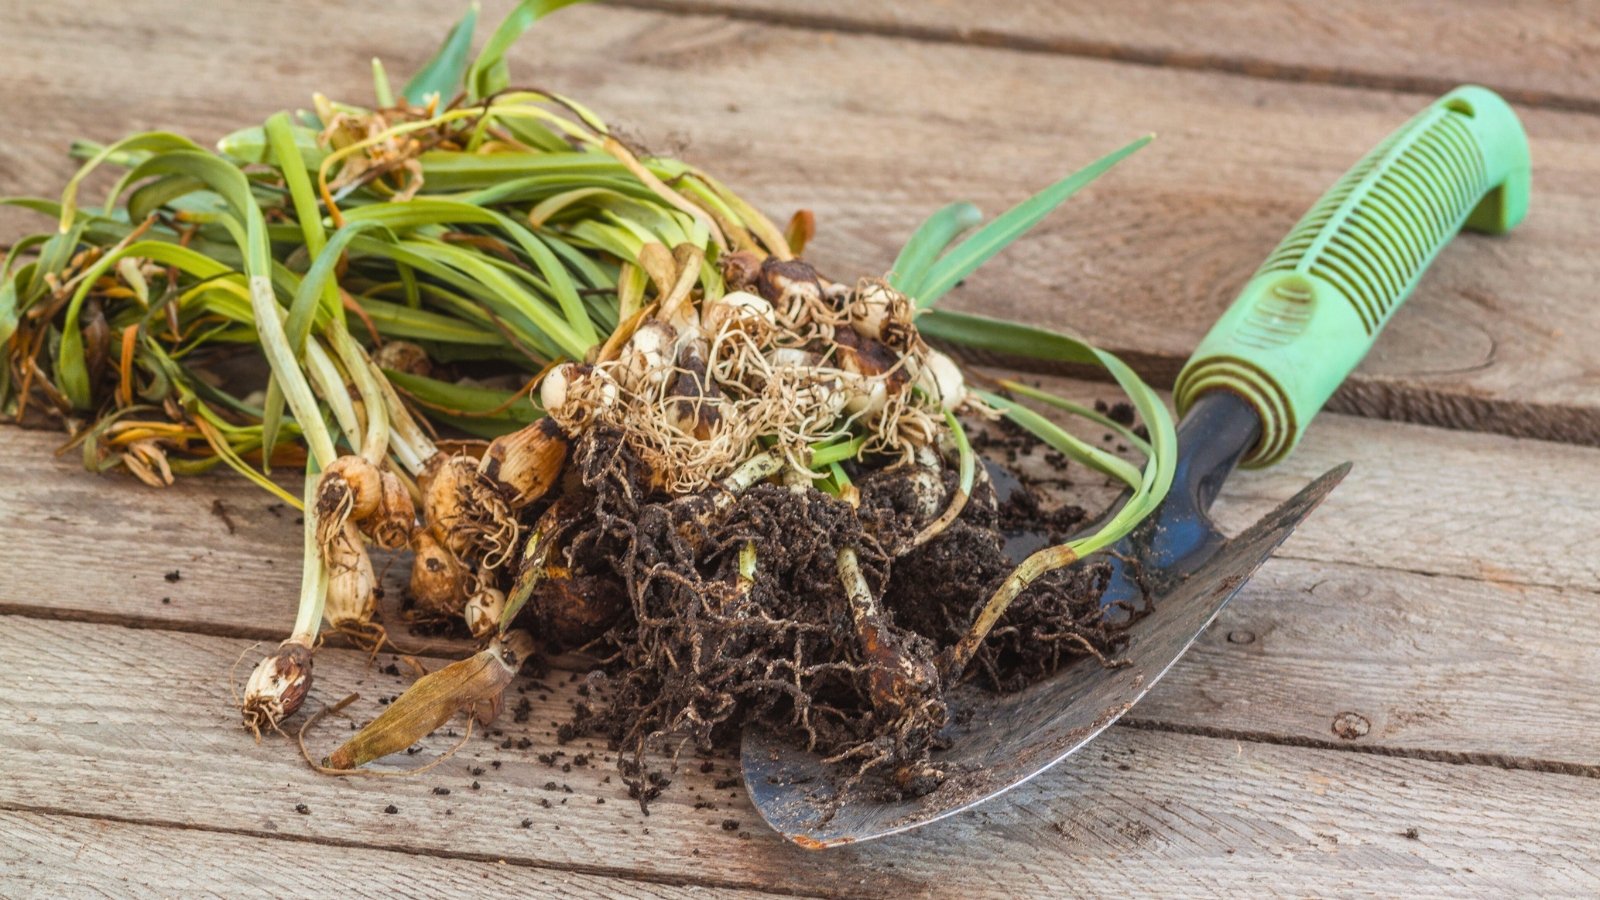 Small offsets mature faster than seed-grown plants.
Over time, snowdrop bulbs produce offsets next to themselves. These offsets are small bulbs, and they’re clones of the original one. They’ll grow into mature plants in two to three years, maturing more quickly than seed-started seedlings.
Divide snowdrop clumps in the spring after their flowers fade. Use a pitchfork to lift the bulbs from the ground without damaging them. Puncture the soil below them, and lift slowly.
Tease the plants apart and take care not to bruise or damage any roots. Plant each bulb three inches deep and three inches apart. Grow them en masse for a drift of snow-white blooms at the end of winter!
Twin Scaling
 Sliced bulbs grow new shoots and roots easily.
Surprisingly, you can propagate your precious snowdrop plants by slicing up the bulbs and peeling back their layers. Each bulb has a basal plate on its bottom where new roots sprout. This will grow new roots and shoots when you slice it into multiple pieces.
Before working, wash your hands, your tools, and your workstation to make them sterile. Start by peeling the outer layers of the snowdrop bulb, and slice the nose, or top, of it off. Then, place it on the sliced end. Slice it again in half, and again in quarters, leaving a portion of the basal plate attached to each quarter.
Take one quarter piece and look at its scales, or layers. Peel off the scales individually, ensuring that each layer has a piece of the basal plate on its end. Let the pieces dry for a few hours, then set them inside bags or containers with coco-coir and perlite. Moisten the bags slightly, and close them with air inside.
Leave the scales in a warm, dark location for three months. A pantry, closet, or drawer works well. When they have a tiny bulb at their end, take them out of the bags and pot them up in containers. Keep them moist, but not soggy, during the cool months.
Seed Saving
 Collect seeds carefully when the fruits grow fat.
Seeds grow in the green fruits that sprout from the spent flowers. They naturally fall to the ground when they get too heavy for the stems to bear. You may save the seeds and plant them for dozens of seedlings.
Look for the fruits in early spring. Wait for them to grow fat and heavy, then snip them off when they begin falling to the ground. Split the fruits open carefully with a small knife, then collect the ripe seeds from inside.
Plant two seeds per pot, burying them a quarter inch deep. Water them well, and keep them moist while they sprout. They should grow as the days lengthen and warm in spring.
Popular Varieties
There are many snowdrop varieties to choose from, and these three are a selection of the most popular. Most snowdrop varieties are cultivars of the common snowdrop, Galanthus nivalis. Try growing the giant snowdrop, G. elwesii, if you’d like bigger blooms and leaves (note that it’s only hardy from zones 4 through 7).
Flore Pleno
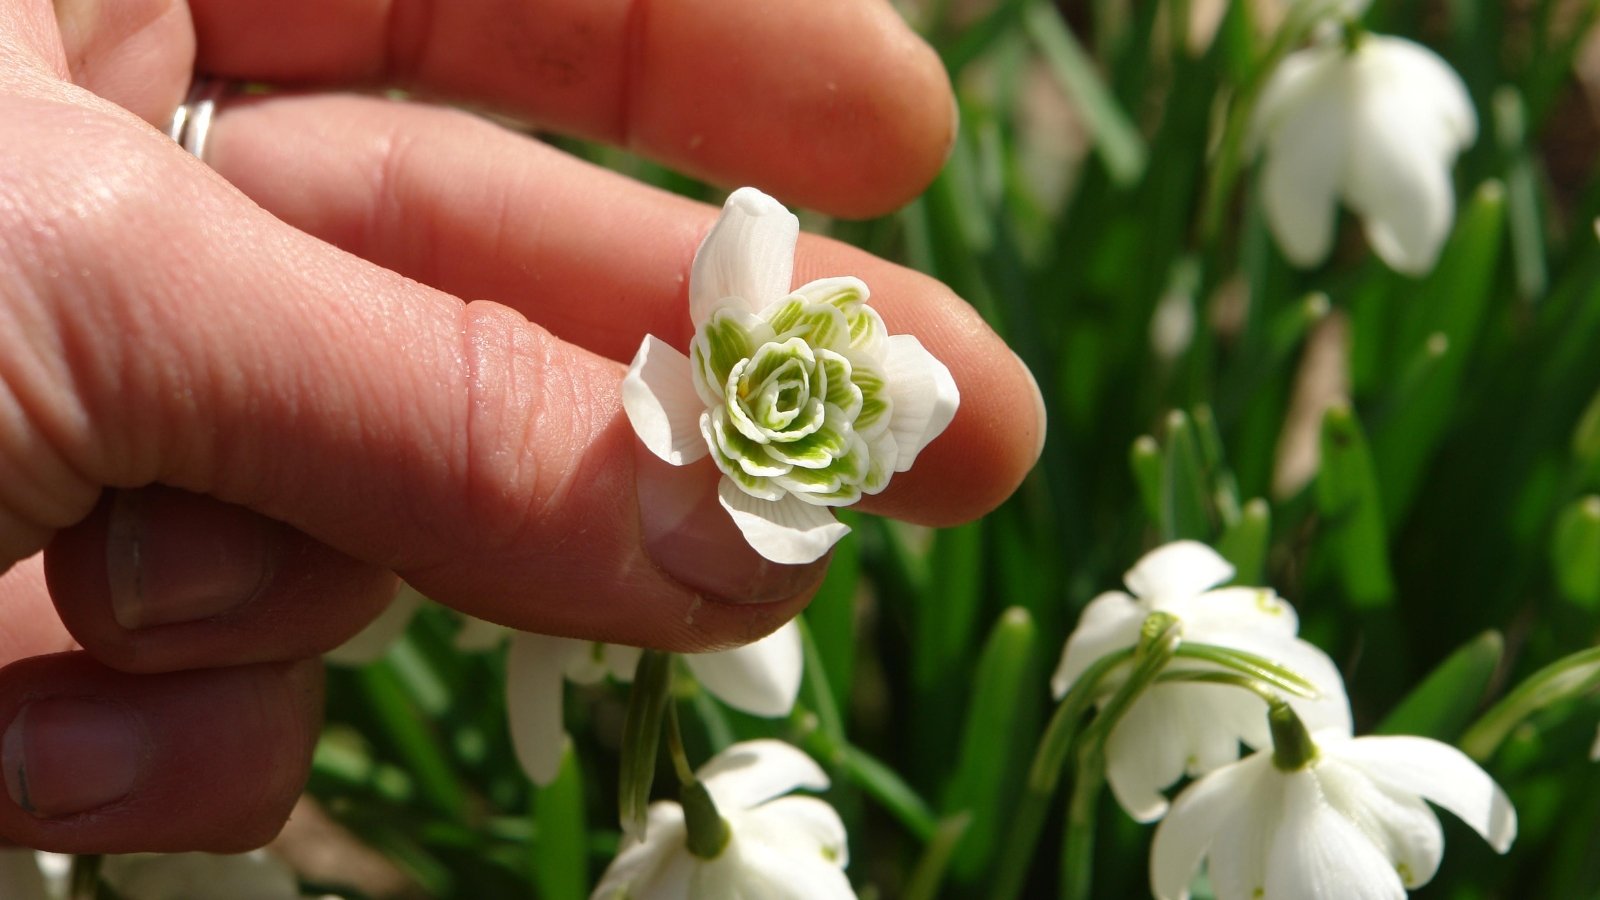 Flowers multiply over time into charming garden drifts.
This longtime favorite variety sprouts flowers with two rows of petals for dramatic effect. The inner row of petals features green markings that stand out from the snow-white outer row of petals.
This variety grows like the common species, spreading slowly over time to form clumps and drifts. Let them propagate themselves, or divide them in the spring to hasten their spread.
Viridi-apice
 Flowers stand out beautifully in cool northern gardens.
‘Viridi-apice’ is like the previous cultivar, except it has green markings both on the inner and outer rows of petals. The double green tips create a stunning presentation, helping the plants stand out a bit on the ground.
This variety may not survive well in warm, southern climates. Grow it in northern regions that have winter temperatures of 20°F (-7°C) or lower for extended periods.
S. Arnott
 Blooming near the door fills the air with fragrance.
This variety is a treasure among cut-flower growers. It features large blooms that outmatch the species. They look like lanterns when they’re closed, and they open to reveal green inner markings and a honey-like scent.
If you like fragrance, then this is the snowdrop cultivar for you. It has a strong scent that outshines other varieties. Grow it in a container near your doorstep for showstopping blooms and incredible aromas.
Common Problems
Pests and diseases rarely plague snowdrops. They do have growing issues, though, like a lack of blooms or mushy bulbs. Correct the problems, and the issues should disappear.
No Blooms
 Choose hardy bulbs if winters stay unusually mild.
A lack of blooms is likely the result of not enough cold in the wintertime. Snowdrop flowers need a cold stratification period during the winter to bloom and grow at the end of the season. Without enough cold, they’ll struggle and die out over a few years.
Consider choosing warm-tolerant bulbs that thrive in your region if it’s zone 8 or above. Consider lilies, dahlias, and begonias.
Rotting Bulbs
 Mushy bulbs usually mean overwatering or poor drainage.
Rotting, mushy bulbs are likely the result of too much water or insufficient drainage in the soil. Amend poor soils with compost, and water less in areas with heavy clay.
If you’re growing snowdrop flowers in containers, ensure they have sufficient drainage. Check their bottoms for a drainage hole or two that’ll let excess water flow out.
Frequently Asked Questions
Check local plant nurseries, garden centers, and home improvement stores. If they don’t have any, look online from reputable sellers and specialty shops.
Yes, they are. Keep snowdrops well out of reach of your pets, and contact the vet if they eat them.
Snowdrops aren’t invasive in any state of the U.S. They naturalize well and form clumps, but they won’t encroach on wild spaces.


 English (US) ·
  French (CA) ·