
 8 months ago
131
8 months ago
131
PROTECT YOUR DNA WITH QUANTUM TECHNOLOGY
Orgo-Life the new way to the future Advertising by AdpathwayZinnias are stunning annual garden flowers that have stood the test of time. There are varieties with green, pink, orange, red, white, and yellow hues. The incredible variety and their reblooming nature make them standouts in the home garden.
Many gardeners buy zinnias annually when they purchase their vegetable seeds. Catalogs offer them alongside marigolds and sunflowers. You can also find zinnia starts available at plant nurseries in the spring and summer.
When you save zinnia seeds, you avoid having to purchase them from other sources. You can breed varieties that adapt well to your climate, and you’ll always be able to grow your favorite zinnias. Save money and ensure your favorite zinnia cultivars survive by collecting their seeds.
Save seeds from your favorite zinnia cultivars with these five easy steps. It’s not a difficult process, and it’s easy to do in the home garden. You’ll need healthy zinnia plants, a paper bag, a dry container, and snips for harvesting the blooms.

Queeny Lime Red Zinnia

Queeny Lime Red Zinnia Seeds
Giant Purple Zinnia

Giant Purple Zinnia Seeds
Step 1: Select Your Favorite Zinnias
 Collecting from heirlooms secures next year’s familiar charm.
The first step to save zinnia seeds is arguably the most important! The plants you save from will create the seedlings for future seasons. It’s best to collect from multiple zinnia plants that are healthy and robust without pests or diseases.
Avoid collecting seeds from a single plant or flower, as this will lead to weak seedlings that are prone to growing problems in future years. The goal is to create a diverse gene pool within your plant population. In simpler terms, you don’t want to inbreed your zinnia specimens!
If you’d like a specific zinnia to reproduce true to type, you’ll want to isolate it from other plants’ pollen. Place a mesh bag over the blooming flower to prevent insects from contaminating it with other zinnia’s pollen.
Also, only collect from heirloom cultivars if you’d like similar-looking plants next year. Hybrids will not reproduce true to seed, meaning the seedlings will have different traits than the parents. They’ll be incredibly diverse.
If you’re curious, you can save hybrid zinnia seeds and sow them! Consider it a fun experiment. Plant them, then see what kinds of plants you grow that year. Look for funky colors, wonky shapes, and unique textures.
Step 2: Let the Flowers Mature
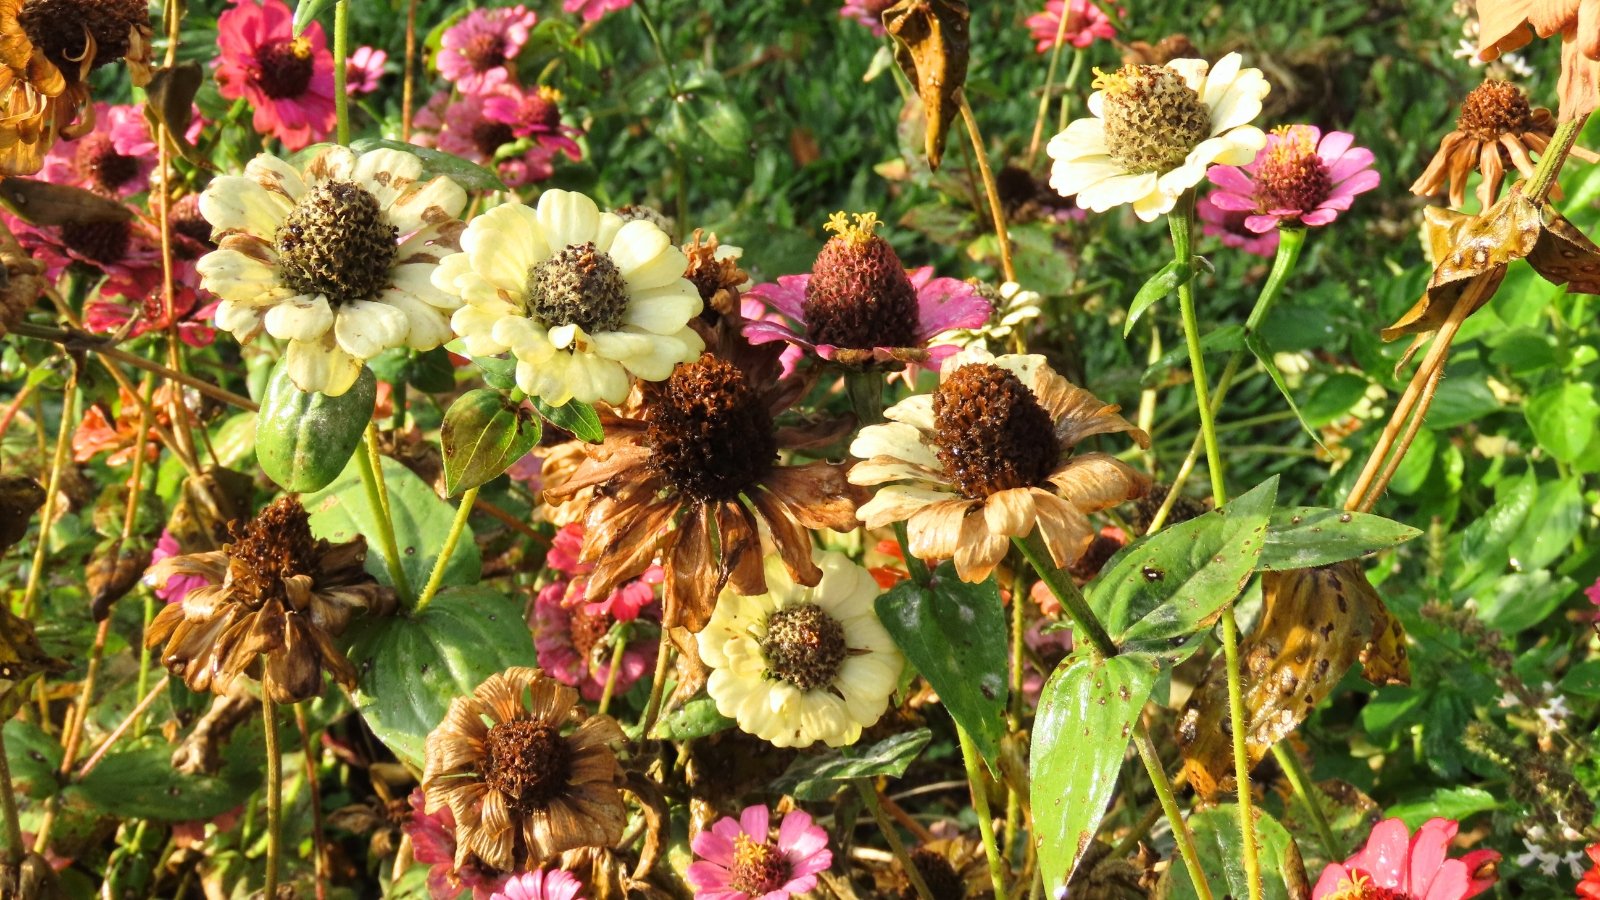 Waiting for petals to brown rewards with ripe treasures.
Start to save zinnia seeds at the end of summer, when the blooms begin to fade and turn brown. Though they don’t look like much, they contain the precious seeds you intend to save. It’s best to leave them on the plant until they’re ripe.
Zinnia flowers are composite, like sunflowers. Each flower is actually a collection of dozens of tiny flowers. When pollen enters each small blossom, it pollinates it and fertilizes the ovules. The ovules turn into seeds, and voilà, the seed head forms!
This process takes a few weeks to finish. Start zinnias early in spring and summer so they have plenty of time to produce blooms and ripe seed heads over the growing season.
Step 3: Snip Spent Blooms
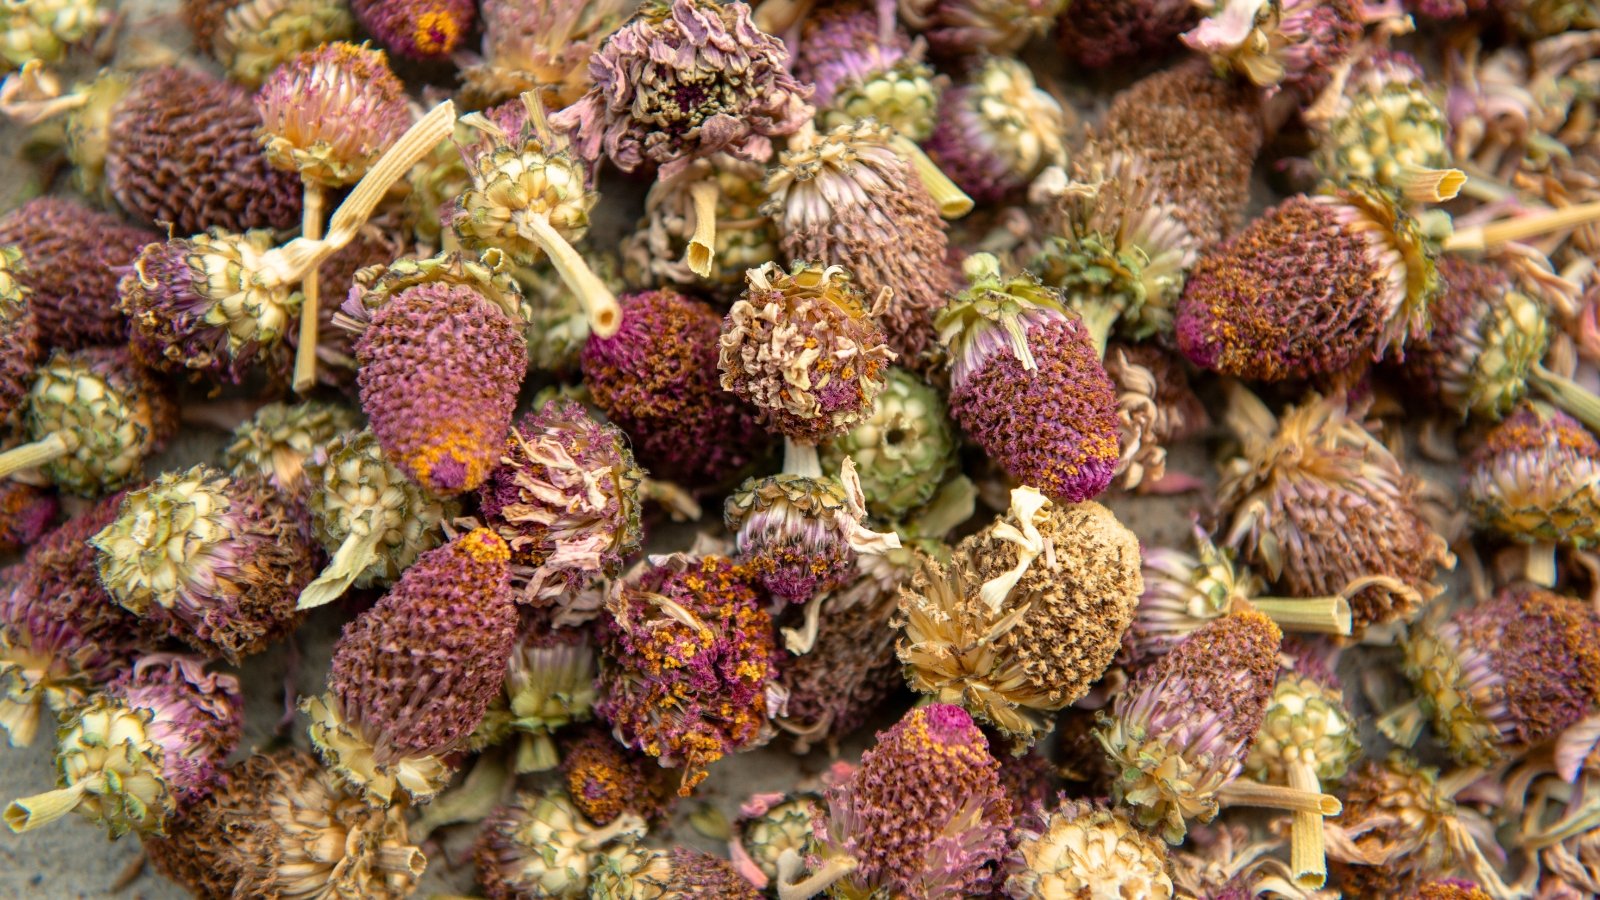 Gentle air circulation keeps the drying process smooth and steady.
Once the flowers are fully ripe, you may snip them down and prepare them for saving. Wait until they’re completely ripe, after the petals fall off. Then, snip each bloom and place them all aside for drying.
Don’t mix up the seed heads! They’ll look similar to each other when they’re fully dry. Keep the varieties separate from each other, and use labels to ensure no mix-ups occur.
To dry the heads fully, place them upside down in brown paper bags. Let them hang for a few weeks in a spot with good airflow, then begin checking them. Some seeds may fall on their own into the bags, while others will remain stuck to the stems.
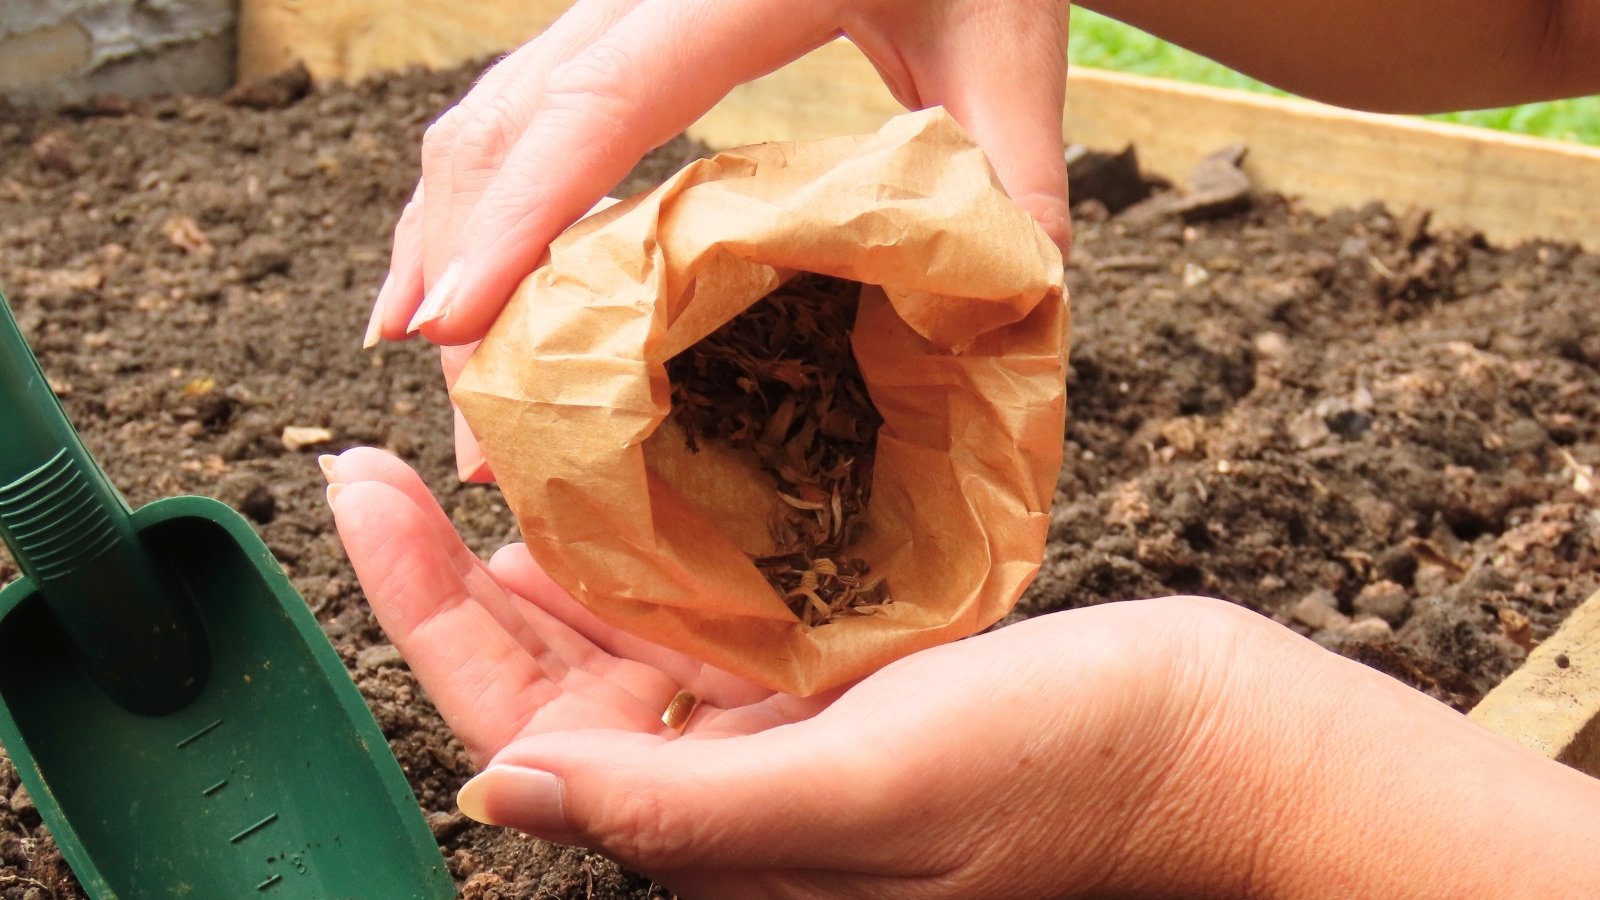
Step 4: Separate the Seeds
 Gentle crushing releases seeds onto the open table.
Take the seed heads out of their bags for further processing once they’re dry and crunchy. Still keep the different varieties separate from each other, processing one type at a time to avoid mixups. Process them on an open table with plenty of space so you don’t lose any of your harvest.
To process a seed head, take it into your hands and gently crush it. The ripe head should fall apart, with each seed falling onto the table below. Set the ripe seeds into piles according to their variety.
Discard any rotten, mushy, or moldy ones. They won’t sprout, and they may spread diseases onto your healthy seed stock. Carefully inspect your harvest to ensure you discard any moldy parts.
Step 5: Store Zinnia Seeds
 Cool, dark spots keep the harvest fresh for longer.
And finally, to save zinnia seeds long-term, store your harvest until you’re ready to grow seedlings next year. The right storage conditions will help the seeds last a long time, between three and five years. It’s best to keep them in a cool, dark, and dry location.
Store them by placing them in containers. Keep them in glass jars, plastic vessels, or paper envelopes. Then, place the containers in a dark spot that’s cool and arid.
You may keep the containers in your pantry, a closet, or a seldom-used drawer. If they’re in airtight containers, you may keep them in your fridge for long-term storage. They’ll store longer in the fridge than they will at room temperature.
Key Takeaways
- Saving healthy seed stock from your favorite zinnia plants is easy! Anyone can do it.
- To replicate the colors of your favorite flowers, save zinnia seeds only from heirloom blooms. Cover them with mesh bags to prevent cross-pollination.
- Let the flowers mature, collect them, let them dry, then break them apart and keep the seeds in containers.
- Discard mushy or moldy pieces, and separate them from the healthy parts you’re saving.
- A healthy zinnia seed will last for three to five years. Store the harvest in airtight containers in the closet, a pantry, or your fridge.
Frequently Asked Questions
It’s time to save them at the end of summer and the beginning of fall, when the growing season comes to a close. Watch for the flowers, and collect them after they fade fully.
Follow the five steps above for the easiest seed-saving process.
Yes, you can! Not all of the flowers in the bouquet will work, though some old ones may ripen properly. Remove them from the vase and let them dry for collecting.


 English (US) ·
  French (CA) ·