
 21 hours ago
13
21 hours ago
13
PROTECT YOUR DNA WITH QUANTUM TECHNOLOGY
Orgo-Life the new way to the future Advertising by AdpathwayAfter you pull your summer and fall crops from the garden, the growing season isn’t over. It’s easy to leave your beds empty over the winter, but bare soil is susceptible to erosion, nutrient leaching, compaction, and other problems.
Transitioning your annual beds to cover crops in the fall will protect your soil over the winter and prepare the ground for next year’s crop.
Planting cover crops isn’t difficult, but it can be intimidating if you’re new to growing these beneficial plants. I’ll explain how to select the proper cover crop for your context, when to sow the seeds, and how to manage your crops for maximum benefits.
Cover Crop Crimson Clover

Cover Crop Crimson Clover Seed Shaker

Hairy Vetch Cover Crop Seeds

Soil Builder Peas and Oats Cover Crop Seeds
Look at Your Calendar
 Soil benefits from amendment before frost arrives.
Many fall cover crops can survive cold temperatures, but that doesn’t mean they can grow with low light. If you want to plant your annual beds with cover crops like rye or clover, sow your seeds early enough in the season so they can germinate and grow.
Using your last frost date as a guide is an easy way to determine you’re sowing at the right time. Aim to sow your seeds at least one month before your first fall frost. Growers in warmer areas and southern latitudes can get away with planting into October and early November, but gardeners in zones 5 and below should sow their fall cover crops in September.
If you know you want to grow fall cover crops, work this information into your planting schedule. For example, after you pull your tomatoes, you should sow rye or clover rather than carrots.
It may seem like planting cover crops in annual beds limits your harvest, and they will prevent you from planting overwintered crops. However, cover crops improve the soil and lead to healthier plants in the spring.
Choose Your Cover Crop Species
Numerous plants work well as fall cover crops for annual beds, and they all provide unique benefits. Here are some options that you can sow in the fall.
You can plant a single species or mix multiple together. Some popular combinations are winter rye and hairy vetch, and oats and winter peas.
Oats
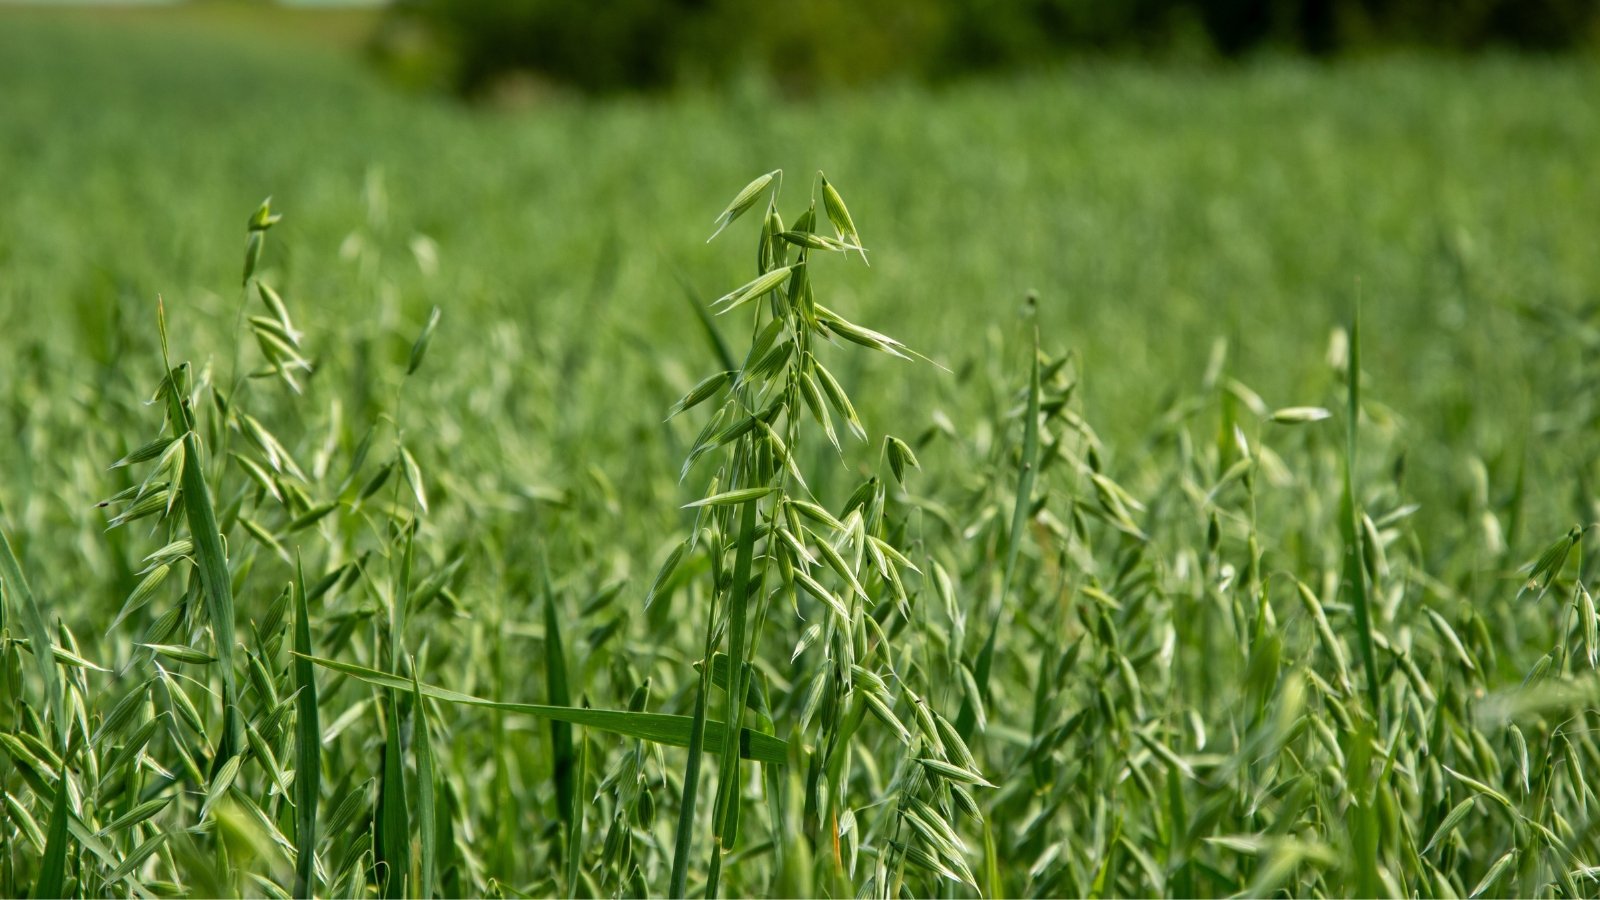 Thick growth smothers weeds before they become troublesome.
Best for adding biomass, scavenging nutrients, and avoiding the need for spring termination.
People often associate oats with the grains that make up granola and Cheerios, but these plants also make a fantastic cover crop for annual beds. They grow quickly, forming a dense stand of robust green foliage that suppresses weeds and prevents erosion.
Oats are naturally killed by cold temperatures in zones 7 and below, so you don’t have to deal with mowing or crimping the plants in the spring. They’ll die when temperatures are in the 20s for a few days, leaving behind a thick mass of dead organic material that covers the ground until spring.
If you live in an area where the oats survive the winter, you can kill them in the spring. Look for the time when the plants’ seeds are in the milk stage; the seeds will produce a milky sap when squeezed. You can knock the crop down with a t-post and tarp, mow it to the ground, or chop it near the ground with a pair of clippers or weed-eater.
Winter Rye
 Heavy biomass keeps weeds from taking over gardens.
Best for late sowing, cold climates, weed suppression, and aeration.
Many crops require warm soil temperatures to germinate, which is one reason you need to plant them early in the fall. Winter rye can germinate at temperatures as low as 33°F (1°C) and survive temperatures down to -30°F (-34°C)! This impressive cold tolerance makes it one of the best cover crops for growers in cold areas and those sowing seeds later in the fall.
Winter rye also produces an impressive amount of biomass above and below ground. This helps hold soil in place and prevents compaction over the winter. When spring arrives, terminating the crop results in a grown-in-place mulch that continues to suppress weeds.
Be aware that rye can suppress plant growth in the weeks following termination thanks to its impressive biomass and allelopathic properties. Plan to kill your rye at least two weeks before you hope to plant your spring crops.
Hairy Vetch
 Robust vines form a living mulch for soil.
Best for adding nitrogen and cold climates.
This vining legume produces lots of biomass and adds nitrogen to the soil. It mixes well with grains, especially winter rye.
Hairy vetch often grows slowly in the fall, but it explodes when warmer and longer spring days arrive. This growth is great for the soil, but the robust vines can make it difficult to terminate since they easily wrap around mower blades.
If you’re mixing vetch and rye together, flattening the crops, then tarping them for a few weeks is the best termination strategy. You’ll be left with a thick mulch that you can use to prevent spring weeds.
Austrian Winter Pea
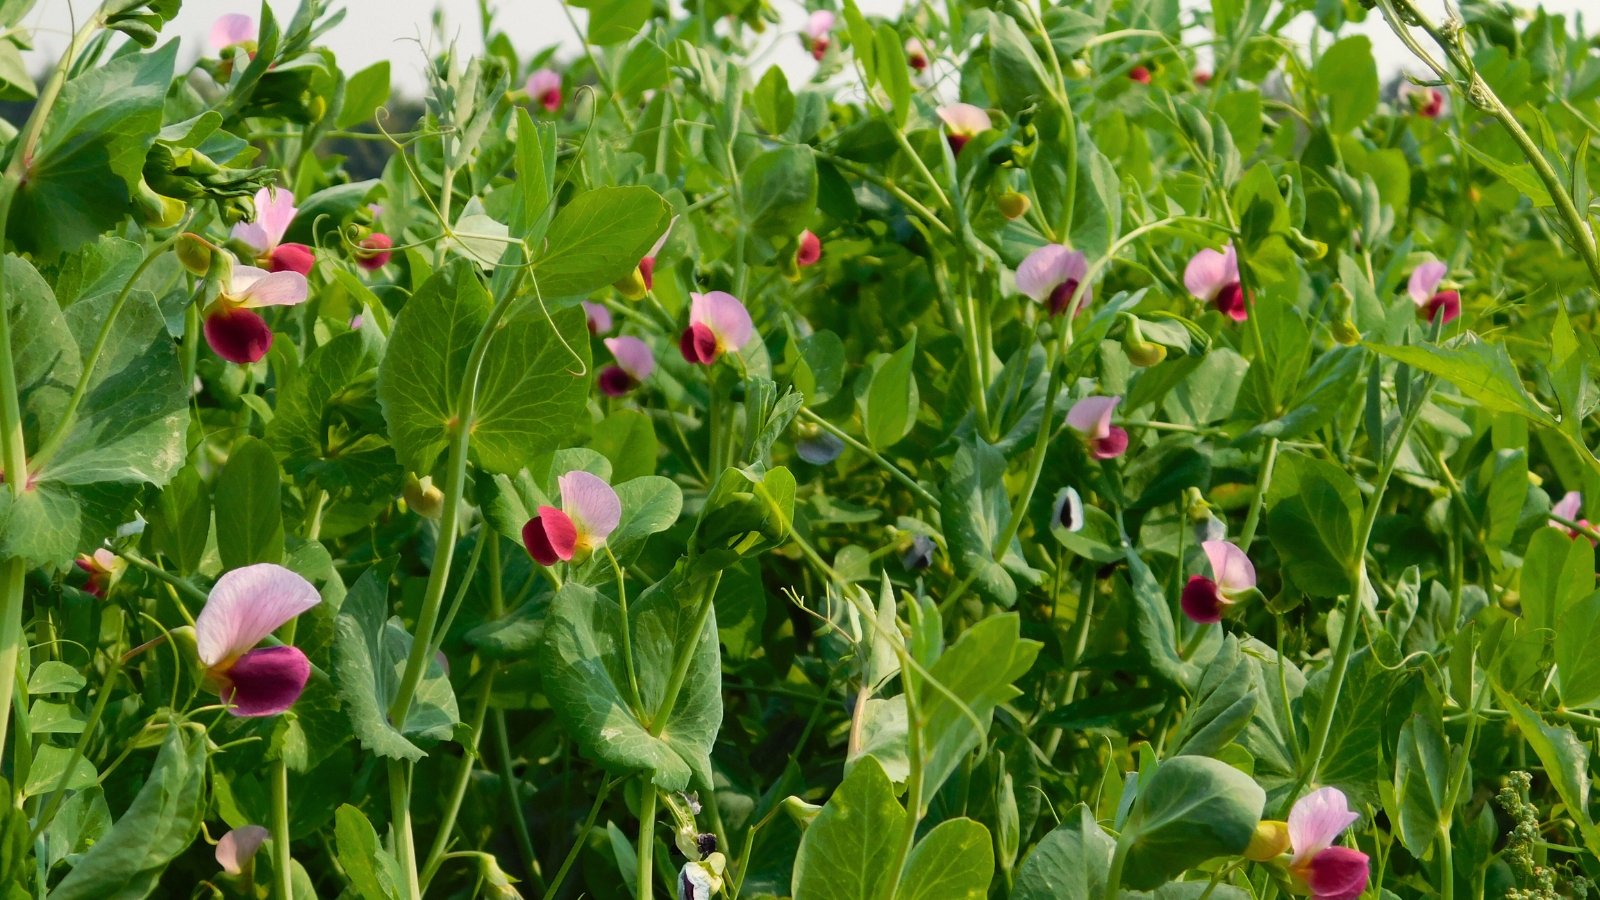 Soil gains nutrients while the plants hibernate quietly.
Best for adding nitrogen and biomass in cold climates.
You can use any type of pea as a fall cover crop for annual beds, but Austrian winter pea is preferred thanks to its cold tolerance. The plants can tolerate brief periods down to 0°F (-18°C), but they’ll likely winter kill in zone 6 and below.
Mixing peas with oats is a common combo since they both die at similar temperatures. The peas will fix nitrogen while the oats help hold the soil in place and add organic matter to the soil.
Crimson Clover
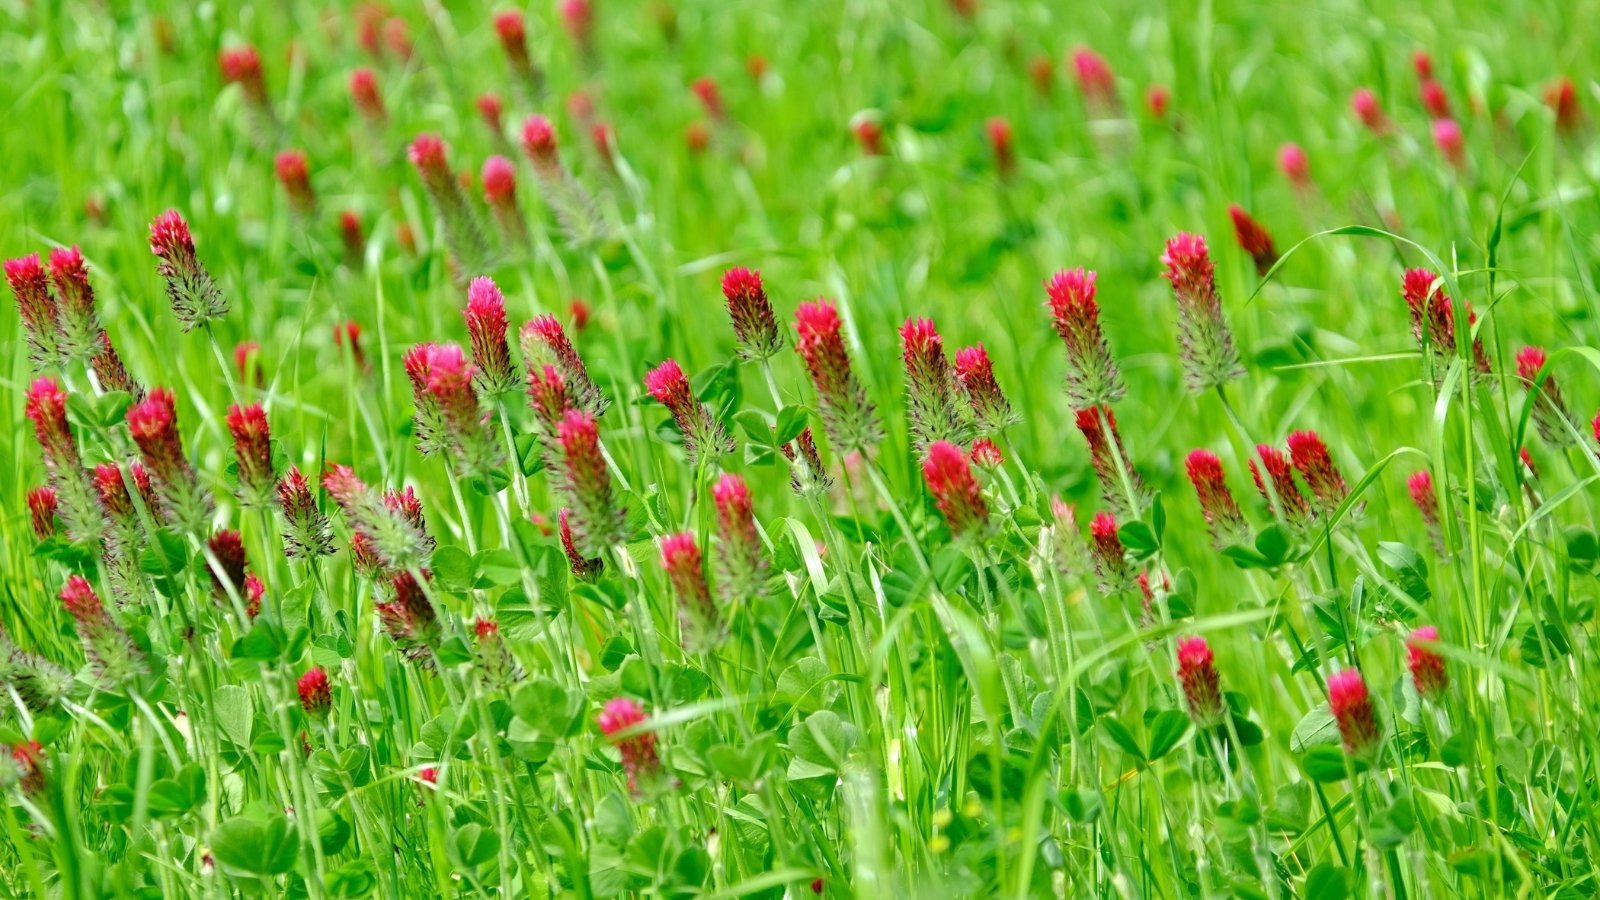 Hardy plants cover the ground while feeding soil deeply.
Best for adding nitrogen and reducing compaction.
Crimson clover produces stunning, deep red flowers while enriching the soil with nitrogen. The tiny seeds germinate well when broadcast and lightly raked into the soil, so there’s no need to use a seeder.
You can even sprinkle the seeds in beds that are growing fall crops like cabbage and cauliflower. The clover will continue to grow after you harvest the crops, covering the ground throughout the winter while adding nutrients. Crimson clover can survive temperatures as low as 0°F (-18°C), so your growing zone will determine whether you need to terminate it in the spring.
Mowing is the easiest way to kill crimson clover. The tough plants can sometimes be difficult to fully terminate, but spreading a tarp over the crops for a few weeks will ensure their death and help prepare the bed for spring crops.
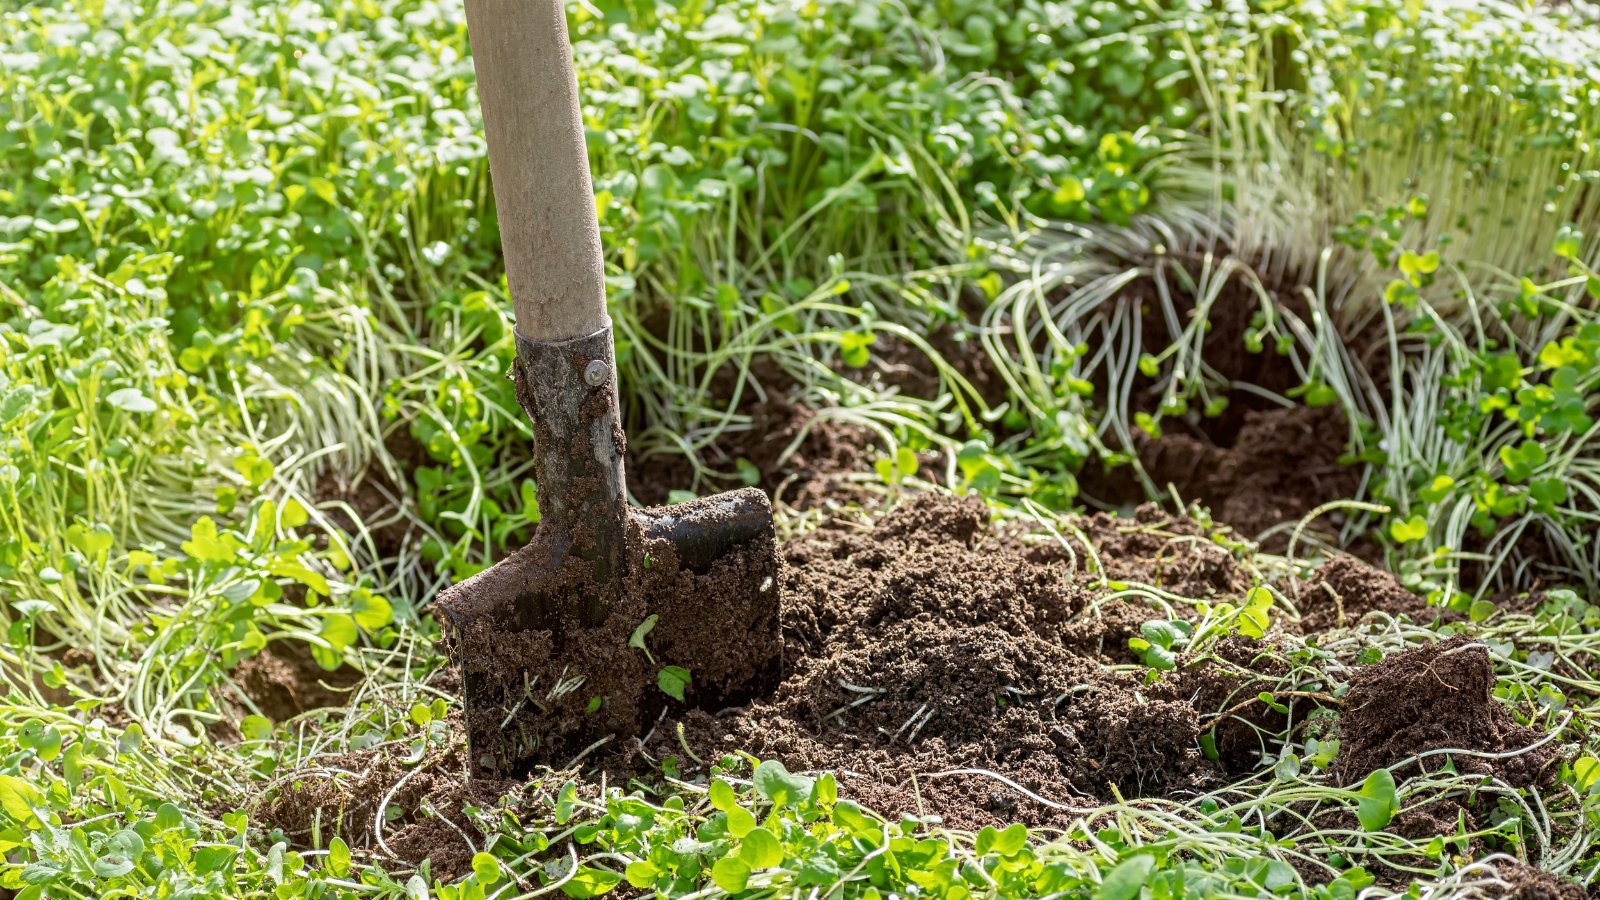
Clear the Old Crop
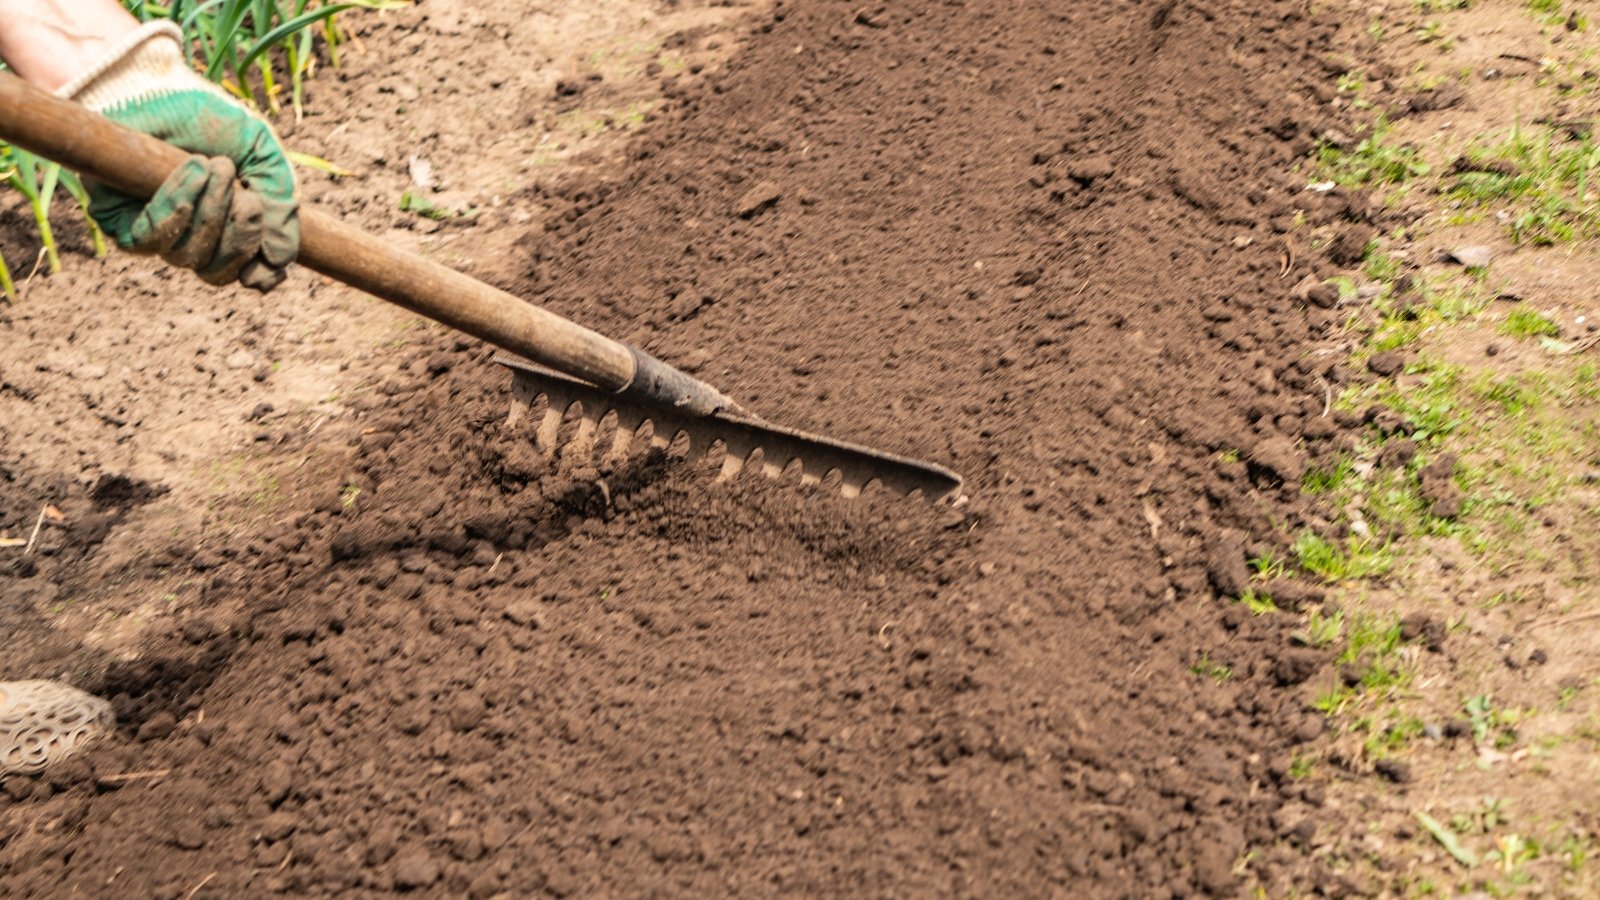 Removing previous crops makes room for new growth.
Once you’ve determined your planting date and chosen a suitable cover crop for your annual beds, it’s time to prepare your bed for planting. The first step is removing the previous crop, unless you plan to overseed your cash crops with the cover.
If you just harvested a root crop like carrots or beets, all you have to do is rake your bed flat. You should clear larger plants like tomatoes and peppers from the bed before you sow your cover crops.
After you’ve cleared the remaining vegetation, rake your bed flat. You can add a light layer of compost to the soil surface, but this isn’t necessary.
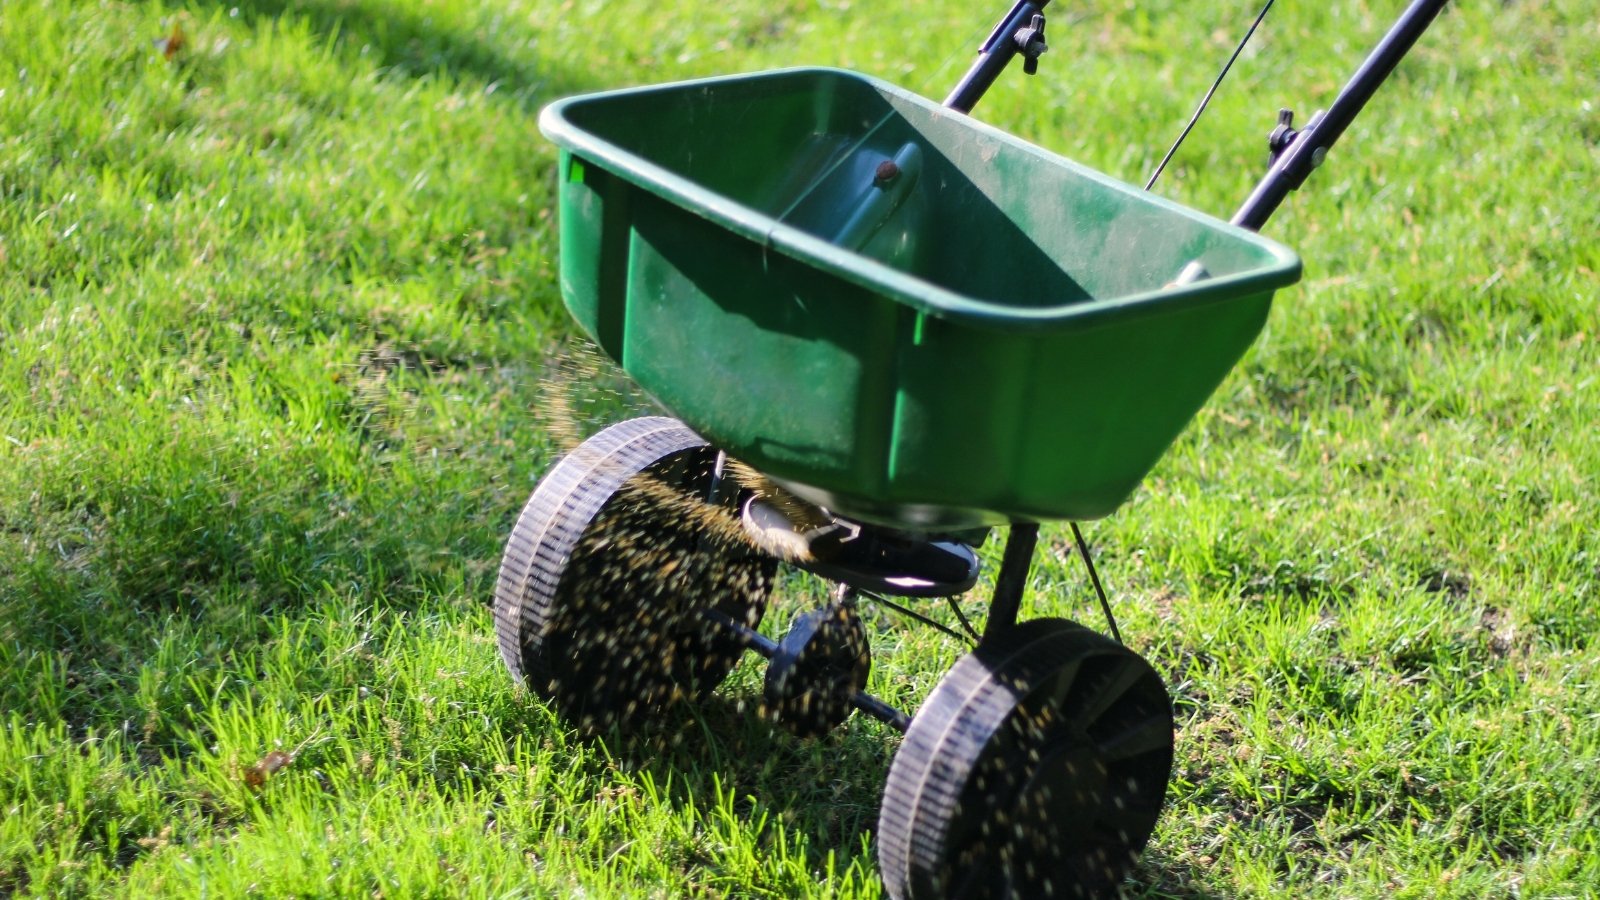
Sow Your Cover Crop
After you clear and rake your bed, it’s time to plant these annual beds with cover crops. The sowing method depends on both the crop and the available tools. In general, you’ll either broadcast the seeds or sow them with a seeder.
Regardless of which method you use, water well after planting. Sowing right before a rain is ideal, but you can use a sprinkler or hose to irrigate if there’s no rain in the forecast.
Broadcasting
 Small gardens benefit from gently scattering seeds by hand.
Broadcasting seeds is the easiest way to sow cover crops, but germination is less reliable than if you plant with a seeder or by hand. Look up the seeding rate, measure your garden area, weigh out the appropriate amount of seed, then evenly sprinkle the seeds throughout your garden.
Sprinkling the seeds by hand works well for most small gardens, but you can use a push seeder or belly-mounted seeder for larger areas. After you sprinkle the seeds, lightly rake the area to incorporate the seeds. Raking is optional, but it will encourage germination and prevent birds from eating the seeds.
Using a Seeder
 Push seeders create neat rows and strong soil contact.
If you have access to a push seeder, you can use it to sow straight lines of cover crops over annual beds. This seeding method creates a neat appearance and also improves seed-to-soil contact. This leads to more reliable germination.
Choose a seed plate that matches the seed size and calibrate it so it plants at the proper spacing. Grains like rye, oats, and wheat can tolerate tight spacing, but legumes like peas and vetch like more room to sprawl.
You can use a seed to sow cover crop mixes, but be aware of the seeds’ varying sizes. Since oat and pea seeds are different sizes, use two different seeding plates and sow the crops in individual rows.
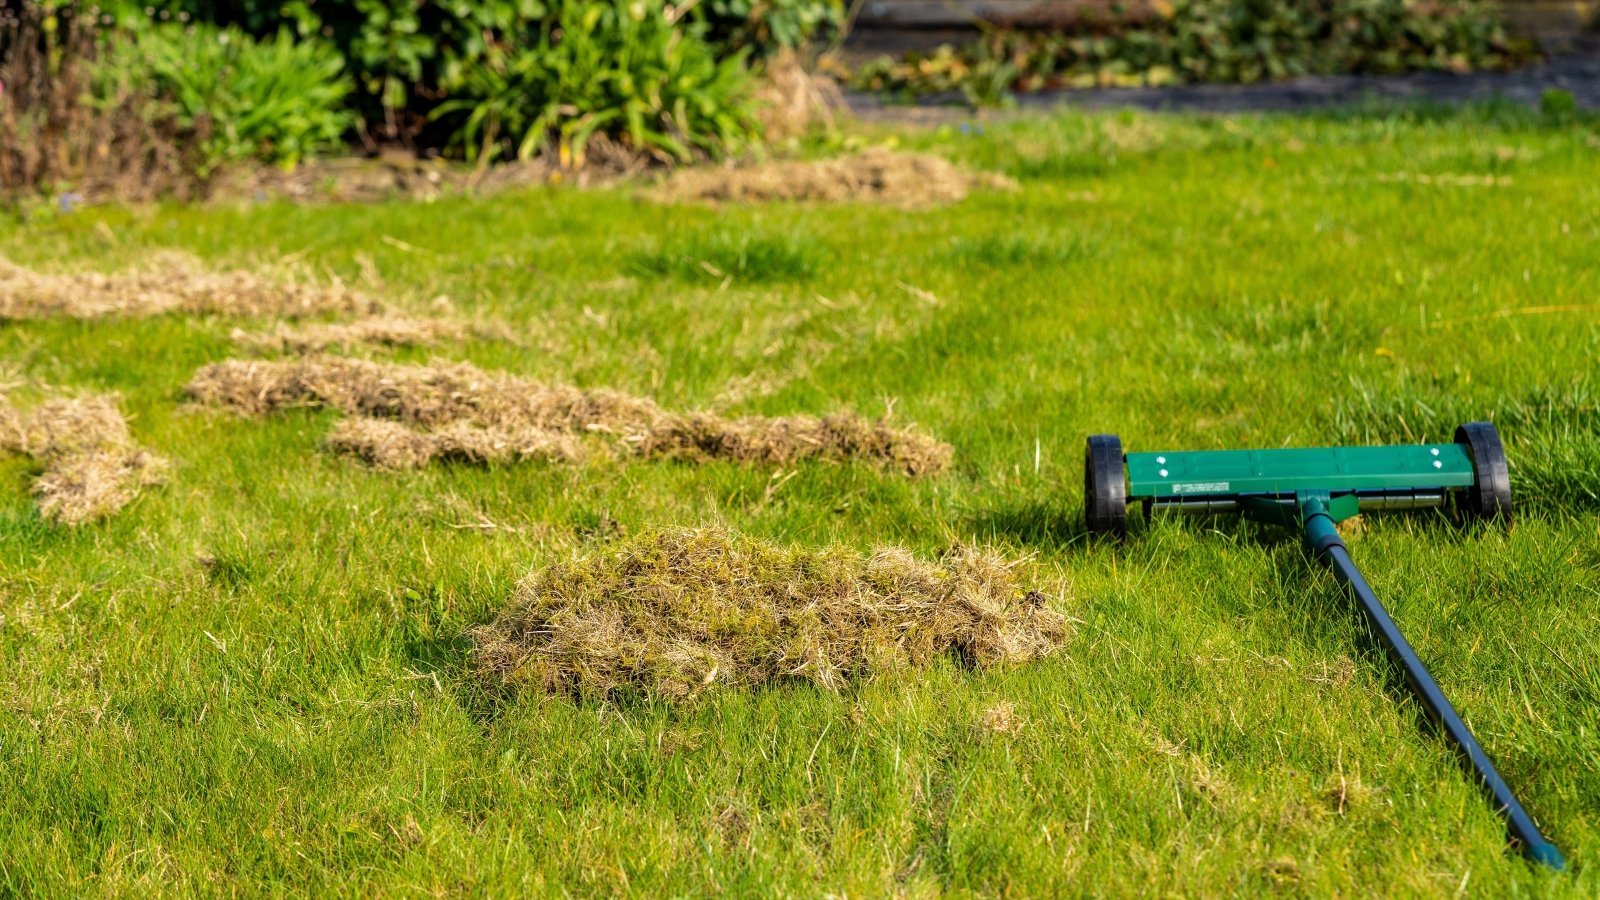
Plan a Termination Strategy
 Mowing or crimping works best once flowering begins.
We touched on termination when we talked about selecting a crop, but I’d like to reiterate the importance of determining how you’ll kill your cover before the time arrives. Cover crops in annual beds are largely beneficial, but they can grow out of control and/or go to seed and pepper your garden with weeds.
Each crop has termination methods that work better than others. Mowing, crimping, and tarping are all common methods.
Along with selecting a method, pay attention to the ideal time to complete this action. Many grains can be killed by mowing or crimping when they’re flowering, but they’ll quickly regrow if you try to terminate them before this time.
Give yourself a buffer of a few weeks when you’re planning your spring crop. This will give you extra time to fully kill your cover crop, if you need it.


 English (US) ·
  French (CA) ·